



My Valentine's Day gift was a behind-the-scenes tour at Busch Gardens. I got to feed a giraffe, a black rhino, and flamingos. I also got to pet the giraffes, clydesdales, flamingos, an anteater, a hatchling Nene, and a New Zealand opossum (much cuter than our opossums). We also had up-close encounters (but no touching) with a hippo and several species of parrot. I had a ball! Oh yeah, now you can see my new hair color. You don't have to look too closely to notice that it went on kind of spotty. It sure looks bright in the sun!
Saturday, February 14, 2009
PAD 2-14-09

Follow Up
Hey! I received a comment from Melissa on my PAD 2-12-09 post, which included some questions. I'd love to respond, but no e-mail address was provided. Melissa, if you happen to see this post, please e-mail me. I have added an "E-mail Me" link to the bottom of the right hand column.
The same goes for everyone else. If you have questions or comments for me, and don't want to leave a comment on a post, feel free to e-mail me!
Thanks! I now return you to your regularly scheduled blog surfing....
Oh, and HAPPY VALENTINE'S DAY!
Friday, February 13, 2009
PAD 2-13-09
Coloring my hair tonight. Is it mean that you won't get to see how it turned out until tomorrow? Let me just say, it did not turn out like the picture on the box.
Thursday, February 12, 2009


Tuesday, February 10, 2009

PAD 2-9-09
One of my Valentine's gifts arrived today. It may look cheesy, but it's hard to find dairy-free, gluten-free, artificial color-free assorted chocolates.

Monday, February 9, 2009
Inspiration Speak
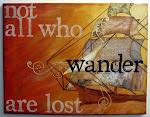
I stumbled upon this, pretty amazing, huh? I'm wondering if I can create something similar (although obviously not quite as cool) with the Cricut and Design Studio? Maybe I'll give it a shot.
Sunday, February 8, 2009
February Technique 1 - Textured Backgrounds
Do you love textured backgrounds? Can't get enough of Basic Grey solids? Need them in every color? How would you like an easy way to create your own?
Step 1 - Crumple a white sheet of tissue paper into a ball several times if you want a lot of texture in your background, or leave as is if you only want a little texture in your background. Stretch your tissue paper back out most of the way once you are done crumpling. Make sure you use a piece of tissue paper that is larger than your desired background.
Step 2 - Lay down a thick layer of Mod Podge on a sheet of white cardstock (covering the entire paper) and then adhere your tissue paper. I am using watercolor paper in the example below because I am making a larger piece of home decor for a friend. I don't suggest using anything thinner than cardstock because of the amount of moisture involved in this technique. If your project curls even after it has dried, simply lay it upside down under a heavy object over night to flatten. Step 3 - Allow the under layer of Mod Podge to dry for 5-10 minutes and then put down a layer of Mod Podge over your tissue paper, making sure to adhere down any areas that are sticking up. Keep this layer of Mod Podge random, thin in places, thick in places, maybe even absent in some spots. You should have wrinkles and bumps in your tissue paper at this point. Trim off any excess (overhanging) tissue paper.
 Step 4 - Allow your project to dry for about an hour. Then start adding acrylic paint with a foam brush. Where the Mod Podge layer is thicker, the acrylic paint won't soak in immediately and you can continue to mix in additional colors of acrylic paint (and you'll see more white from the background paper). Where the Mod Podge layer is thinner, the acrylic paint will soak into the tissue paper, resulting in darker bands of color. The paint will also have a tendency to gather around the wrinkles and bumps in the tissue paper, resulting in a cool textural look. Keep adding additional colors/layers of acrylic paint until you like the look.
 Here's my finished background. As a last step, I sprayed on some Patina Glimmer Mist and allowed it to dry into the paint.
 And here is my work in progress. I am making a "One Little Word" piece of home decor for a friend inspired by this print that I saw on Ali Edwards' Blog.
 Here is an example of the results of this technique if you DO NOT crumple the tissue paper. I created the black background using the same steps as given above.
Subscribe to:
Posts (Atom)
