


Watching the Gasparilla Parade of Pirates (the day parade) on TV because I still didn't feel up to going. Hopefully we'll be able to make the night parade in a couple of weeks.
Sunday, February 8, 2009
PAD 2-7-09


Friday, February 6, 2009
Create Your Own Digital Photo Overlay
Ok, with the popularity of Project 365, I've seen date/day of the week digital journaling overlays popping up everywhere. But I haven't necessarily found any I love, and I like to have lots of different ones so I'm not using the same ones over and over again. Well, it turns out they are pretty easy to create.
Step 1 - Create a New File. Go to FILE -> NEW -> BLANK FILE.
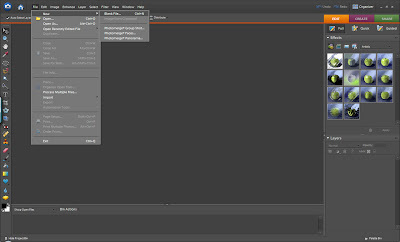 In the dialog box do the following:
- name your file (optional)
- set the width to 6 inches
- set the height to 4 inches
- set the resolution to 1200 pixels per inch
- set the background contents to tranparent
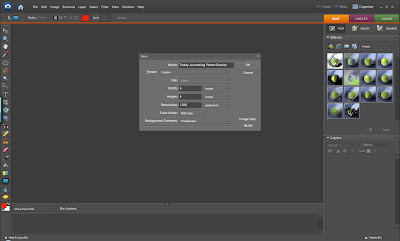 These settings will allow you to resize the overlay you are creating, up to 12x12 inches, with adequate resolution for photo quality printing.
 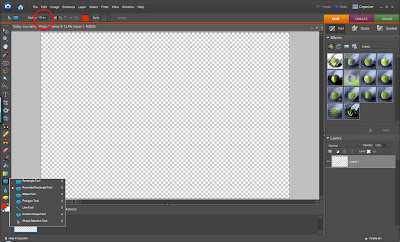 In the tool options at the top of your screen, select STYLE and then click on the arrows at the top right hand corner of the dialog box. From the drop down list choose VISIBILITY and then select HIDE from the dialog box. This option will allow us to create an outline of a rounded rectangle instead of a filled in rectangle.
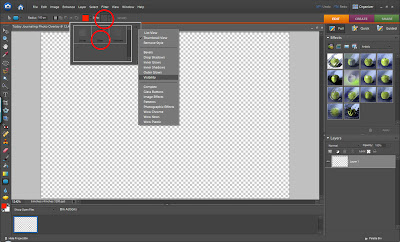 Drag your rounded rectangle to a size slightly smaller than your background. Don't worry about the color of the rectangle yet. Next, press and hold CONTROL and click on the layer containing your shape in the Layers Palette (bottom right hand corner of screen). This will select the objects in that layer.
 In the dialog box do the following:
- name your file (optional)
- set the width to 6 inches
- set the height to 4 inches
- set the resolution to 1200 pixels per inch
- set the background contents to tranparent
 These settings will allow you to resize the overlay you are creating, up to 12x12 inches, with adequate resolution for photo quality printing.
 Step 2 - Draw Your Overlay. Click on the SHAPE TOOL (see photo below) and select the ROUNDED RECTANGLE TOOL. In the tool options at the top of your screen, select a radius for your rounded corners, I am using 100 pixels.
 In the tool options at the top of your screen, select STYLE and then click on the arrows at the top right hand corner of the dialog box. From the drop down list choose VISIBILITY and then select HIDE from the dialog box. This option will allow us to create an outline of a rounded rectangle instead of a filled in rectangle.
 Drag your rounded rectangle to a size slightly smaller than your background. Don't worry about the color of the rectangle yet. Next, press and hold CONTROL and click on the layer containing your shape in the Layers Palette (bottom right hand corner of screen). This will select the objects in that layer.
 Now, while your shape is selected, create a new layer by clicking on LAYER -> NEW -> LAYER. Name the new layer if you want and then click OK in the dialog box. The first layer holds a hidden image of your shape. We will actually be creating your shape in this new layer.
 Your shape should still be selected. Choose EDIT -> STROKE (OUTLINE SELECTION).

 Repeat the steps above using other shapes and text as desired. You do not need to create a hidden image or use the STROKE command on text. Those steps are only necessary when you want to create an outline of a shape.
 Once your are happy with the overlay, SAVE your overlay as a PSD file so you can come back and modify it in the future if you want. Once your overlay is saved merge all of the layers into one by clicking LAYER -> MERGE VISIBLE. Save the resulting overlay as a PNG file by clicking FILE -> SAVE AS and the selecting PNG under format.
Your resulting PNG file can be used as any other PNG file. I describe some of the things you can do with PNG files in Digital Embellishment Basics.
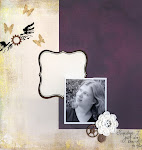
Here's what my overlay looks like recolored and on a photo.
 Keep in mind that I like to create high resolution overlays so that I can use them on photos/layouts up to 12x12 inches in size. So, you may need to reduce the resolution of the overlay before you move it onto a 4x6 photo, or else you probably won't even see it because it will be so much larger than the photo.
Happy overlay making!
Thursday, February 5, 2009
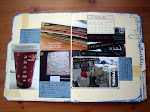
Binding My Project 365 Folders
I am using 2-inch, white, uncoated book binding tape that I purchased here to bind my weekly folders together. I chose white book binding tape because I am using white as an accent color throughout the book and so that I could easily alter the tape if I wanted to.
I have decided to alter the tape differently for each month. For the month of January, I am stamping circles on the binding tape with paint. I am doing all of the bindings for January at once.
Step 1. Cut the binding tape slightly longer than the sheets you are binding together and temporarily adhere to a non-stick craft sheet. Step 2. Alter as desired. I am simply stamping randomly with paint using a BoBunny acrylic stamp you can see here. I stamped several times before reloading my stamp with paint to get images of varying saturation.
 Step 3. Lay the folders you want to bind next to each other, leaving approximately 0.1-inch of space (sorry, I'm an engineer, slightly less than 1/8-inch), center the tape, and adhere.
 Step 4. Flip the folders over and trim off the excess tape with a craft knife.
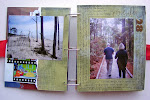
 I will bind all of the folders into a chipboard cover at the end of the year. Unfortunately, there's no real way to bind on the covers until all the interior pages are done.
Farktography
Today's theme is "COLD". Bet this is exactly what those of you in more northern climes need today.
Farktography - Cold
Wednesday, February 4, 2009
PAD 2-4-09
So last night I mention to my hubby that I would like a birthday cake this year...
Just an utterly random thought given that my birthday is in JULY, but apparently I was craving cake...
Which is a complicated thing because I eat a 100% wheat and dairy free diet.
So what does my hubby do? He stops at Whole Foods between school and work this morning and picks up enough gluten-free/dairy-free cake mixes and icing so he can make whatever flavor combination of cake I could possibly want.....
for Valentine's Day.
Tuesday, February 3, 2009
PAD 2-3-09
When I look back at all the pictures I took this week and wonder why I didn't take pictures of anything interesting, THIS picture will remind me it's because I had the FLU.

Sunday, February 1, 2009
PAD 2-1-09
To be clear, I have absolutely no interest in football. But since the Superbowl was local this year, we figured we'd at least catch the end. Pretty good game.
The best part about the Superbowl being local was all the cool parties that have been going on for the last week. Unfortunately, I've had the FLU the whole time....
Subscribe to:
Posts (Atom)
