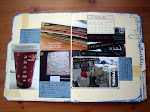
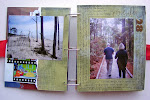
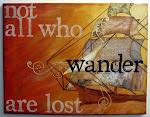
I have started building my journal pages simply by adding different backgrounds on each page and stamping things that inspire me on the tab pages. I tried to create a bunch of different types of backgrounds, while keeping my color palette relatively neutral, to give myself a varied base on which to build. Glimmer mist and mask:
Saturday, May 30, 2009
Inspired Spin Journal - Stage 2
Monday, May 25, 2009
Inspired Spin Journal - Stage 1
One of the many projects I am currently working on is an Inspiration Journal. I am building my journal on the Spinner Album by Zutter. Here is stage 1: I adhered the chipboard letters (Scenic Route) to the top edge of the chipboard album pages using Zip Dry and backed them with painted chipboard flourishes (Maya Road) for support.
I plan to add poems, quotes, photos, swatches, etc. that inspire me as I come by them, along with a few old favorites.
When Scraps Attack...
The black Siberian kitten, currently experimentally named "Widget" had conveniently filed himself under "orange".
Sunday, May 24, 2009
Documentation...
...of what I bought at the Orlando Scrapbook Expo this year:  40 Copic Ciao Markers
8 Stazon ink pads
6 bottles of Glimmer Mist
6 ATC sized metal sheets
6 ATC sized acrylic sheets
5 Fancy Pants rub-ons
4 Creative Cafe rubon swatchbooks
3 bottles of alcohol ink (new colors)
2 Heidi Grace flocked alpha stickers
1 alcohol ink pen
1 8x8 pad of Making Memories ledger paper
1 pack of Tattered Angels glimmer screens
1 pack of mirrored cardstock
1 Tattered Angels 2009 catalog (free with purchase)
1 tiny attacher
1 tiny attacher refill
1 12x12 Fancy Pants stamps
1 tote bag (free with purchase)
Friday, May 8, 2009
Just Figures...
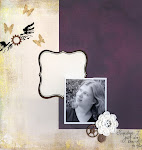
I wasn't planning to share this layout. In fact, I have a small pile of other layouts I wasn't planning to share either that I may post over the next few days. I wasn't planning to share these layouts because I was hoping to use them in my entry for Memory Makers Masters 2010. But it looks like Memory Makers may be going the way of the Dodo (News Link).
I used Ranger's Color Wash Ink in Eggplant and a Bazzill 4-inch Gerbera Daisy to create the background. Use the flower as a mask; just place it on the paper where you want the flower silhouette to show, no need to adhere it. I'm right handed, which means I naturally spray to the left. Since I want my spray to go towards the right side of the paper, I've turned my design upside down to spray.
Hold the color wash bottle at a low angle to the flower and paper and spray from the middle of the flower over.

 Simply remove the flower and save it for use on another project.
 The clear letters were cut from a transparency with my Cricut using the Plantin School Book cartridge (size = 2 inches, no special features). I adhered them to the background paper with my Xyron 150. The adhesive is not visible, it blends into the background paper texture.
 Other products used: rubons by Heidi Swapp, background cardstock by Bazzill, stamps by Fancy Pants and Making Memories, ink by Ranger, pen, skittles. Photo is 2x3.

Tuesday, May 5, 2009
Acrylic Paint Embellishments
Want to make your own inexpensive rubber/gelly-look embellishments?
Want to use paint on your layouts without fear of messing them up?
All you need is a non-stick surface (I use a craft sheet and a silicon baking sheet) and some cheap craft paint. Here's how.
Step 1 - Cut your desired shape out of plastic packaging (does not need to be clear or beautiful), transparencies, or heavy cardstock using punches, dies, or scissors. Step 2 - Apply craft paint (typically $1 - $3 per bottle) to your shape and spread to the edges with your finger.
 Step 3 - Embed glitter, beads, fibers, etc. into the wet paint if desired. In the example below I have sprinkled coarse silver glitter onto the wet paint.
 That's it, cheap, easy to create gelly-look embellishments. Want a shinier finish? Simply brush gloss medium over the dried paint and allow to dry.
Try this technique freehand by squeezing the paint straight from the bottle onto a non-stick surface:

 When the paint is dry, carefully peel it off the non-stick surface. You can now adhere it to a layout using your favorite adhesive. Craft paint dries flexible (this technique does NOT work with Tim Holtz's paint dabbers) so you do not need to be concerned about cracking.
 If you want to create a freehand look but need to use a template, simply slide your template underneath your craft sheet. The craft sheet is just see through enough that you will be able to see the template. In this example, I am using a sheet of 12x12 paper as a template.
Monday, May 4, 2009
Kittens!
So, there may still be a few kinks in the system, but these are the kittens we've chosen:
Saturday, May 2, 2009
A NSD Confession
Happy National Scrapbooking Day! I have a confession to make...
I'm stopping my Photo-a-Day project for this year. Here's why and what I've learned this far:
Reconsider committing to a PAD project if:
1) you have no kids, no pets, few friends, and are not travelling because you are saving up money for a house. You will quickly become tired of taking pictures of your pedicure and the inside of your refrigerator.
2) your spouse adamantly refuses to be photographed. It's not worth a year of marital dissonance.
3) your spouse, when reluctantly photographed, adamantly refuses to have those photos posted to your blog, where you are posting all of your other PADs. See #2.
4) you can not photograph your place of employment for fear of accidentally blogging a photo confidential information. You can also not photograph your spouse's place of employment, which, more often than not, is your living room, for the same reason.
5) you can not bring photographic equipment into your gym, which is the only other place you frequent besides home and work, see #1-4.
I totally plan to try this project again, at some future date. It is an awesome project and an amazing learning experience. However, for now I think I may boil it down to PAW; photo-a-week, at least for the rest of the year.
For those of you who are trying your own PAD project, how's it going?

