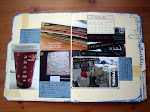
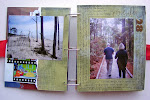
As I mentioned in my first post, I'm taking Dina Wakley's Art Journaling 301 class. Below are the results through Class 2.
I received a comment on the Class 1 post asking why I left so much white space on the pages. It's because each class will build another layer on every page using paint, spray ink, more paint, collage, journaling, and sewing. The white space was left to allow plenty of room for those other elements without crowding each element (although these is some definite overlapping of elements).

Saturday, October 31, 2009
Class 2 - Art Journaling 301
Friday, October 30, 2009
Class 1 - Art Journaling 301
I'm taking Dina Wakley's online class: Art Journaling 301. Here are the results of the first class, which was creating color wash backgrounds. (I apologize, the colors are slightly off in the photos below, the oranges came out yellow. I will try and get better true color photos of these pages for the upcoming class posts.)
Wednesday, October 28, 2009
Monday, October 26, 2009
Check it out!
Every year I hear from people frustrated that they can't find the tags that Tim Holtz uses to create his "12 Tags of Christmas". This year, with the opening of my Etsy shop, I figured I could buy in bulk and offer sets of these tags REALLY CHEAP to all who were looking for them.
 They're in the shop now! Get them and be ready for Christmas creating.
In the mood now? Can't wait for Christmas? Tim also used these tags to create his Halloween Tags this year.
Saturday, October 24, 2009
My Big Day...
So...here's the story....
We've been car shopping since March. In June, I finally decided on the make, model, and color of the car I wanted. We placed an order for the car, however, none of our local dealerships were able to locate the exact model/color we wanted. Therefore, we were told we'd have to wait for a matching model to be shipped over from Japan. While waiting, we continued to shop around.
Then "Cash for Clunkers" happened in August and EVERY relatively fuel efficient vehicle was snapped up. Most dealerships didn't even have a car we could test drive. At this point we decide we might as well wait for the 2010 models to come out.
The 2010 model we wanted began arriving at dealerships in early October. We kept performing internet searches looking for the make/model/color we wanted, to no avail. We contact the local dealership, again. They located two matching cars, one in Miami and one in St. Augustine, FL. Turns out the one in St. Augustine was already sold and they were unable to obtain the one in Miami for us.
Completely fed up with out local dealerships, we contact the dealership in St. Augustine. They confirmed that the car they had on the lot was already sold. However, they stated they might be able to get the car in Miami. Two hours later, we had purchased my new car.
Two weeks later (waiting for delivery from Miami) we FINALLY get to pick up my brand new 2010 RAV4. It was a 6 month adventure I don't plan to repeat for at least 10 more years. Absolutely loving my new car, by the way.
On the way to St. Augustine this morning, we turn a corner and are greeted with this view:
Friday, October 23, 2009
Halloween ATC Holder
Here are four of the ATCs I've created for my Halloween themed ATC holder (see previous post).
Work in Progress
My plan is to decorate this 7Gypsies ATC holder for a couple of different holidays by using repositionable glue dots in the middle of each tray. Here is the background of the Halloween piece I am in the middle of creating: This is just the background. My plan is to turn each of the individual pieces into their own, stand alone ATC and then present them in the ATC holder as shown above with the cohesive background. Not sure how it's going to end up looking, but hey, nothing's permanent :) .
Monday, October 19, 2009
Method Playground Challenge 53
Method Playground Challenge 53 is up, you can view all of the Design Team layouts here.
Challenge 53 revisited the first Method Playground challenge, which was to create a layout background using only cardstock. I interpreted this challenge strictly, meaning that I couldn't use the paint and ink I typically use to create a layout background.
Here is my take on the challenge: The green lace cardstock was cut with my Cricut (Storybook cartridge) and laid off-center on the black cardstock under layer. The silver cardstock was embossed with a Cuttlebug embossing folder and then sanded for a brushed metal look on the raised areas.
Sunday, October 18, 2009
New Etsy Items
I've added several news items to my Etsy store. You can check them out by clicking on the Etsy mini to the left...
<- over there :) .
A Card?
Out of all the things I'm supposed to be working on right now....I'm not doing any of them. Instead, I've been inspired to make a couple of cards for Jennifer McGuire's Cards for Kate campaign. If you haven't heard about it, you can read about it here.
Now, let me clarify, I'm not a card maker. About as far as I've gone down that particular road is one Mother's Day card and last year's Christmas cards. So I raided my stash for appropriate sentiments, and here's the first card I've created, with the intent of giving it to Kate's mother:
 What do you think, appropriate? My intention is to try to get her to crack a smile, but I'm not so great at figuring out what other people will...and will not...take well.
Saturday, October 17, 2009
Saturday Spotlight
Check the blog Three Girls and a Guy. Margaret has started a blog series called "Saturday Spotlight" which highlights a new artist/crafter/scrapbooker every Saturday. I'm honored that she has chosen to highlight me this week. So, skip on over there for a quick expose on my favs, inspirations, etc.
Wednesday, October 14, 2009
See you at the Playground!
Method Playground

Tuesday, October 13, 2009
New Layout...New Technique
Wow. Ever get an idea for a scrapbook technique....and it turns out to be WAY harder than you anticipated?
I had this idea of creating a slight break in a page to show a different background, and then pulling a portion of that background forward to create an accent. Here's the finished page: Lining everything up turned out to be an adventure. But I like the finished product. It shouldn't have been as complicated as it was...it was just one of those nights...
Sunday, October 11, 2009
Fall ATC 2
This is the second ATC I have created for the 2Ps Fall ATC swap. You can see the first one here. This ATC is basically a montage of all things Fall for me, the change in the color of the light, cooler weather moving in, big harvest moons, falling leaves, and, of course, Halloween. Step 1. Cut cardboard to ATC size (2.5 x 3.5 inches). Remove the upper layer of the cardboard(mostly) to expose the ridges. Run the cardboard through the Sizzix machine to flatten. This creates a really interesting texture without the bulk.
Step 2. Cut a sun ray shaped mask from scrap paper. Place the mask along the diagonal of the ATC. Spray Sunflower Glimmer mist below the mask and Tiger Lily Glimmer mist above the mask.
 Step 3. Stamp a flourish several times to create the background of the ATC. I used an Autumn Leaves stamp and Black StazOn.
 Step 4. Punch a moon from scrap vellum (I used a 3-inch circle punch). Adhere along the left side of the ATC (I used the Xyron machine for even adhesive placement). Trim overhanging edges.
 Step 5. Punch fall leaves from copper colored metal. Sand lightly to bring out the base metal color.
 Step 6. Stamp a poison label stamp (mine is from Tim Holtz) on scrap canvas. Cut out and ink the edges with black ink. Fray the edges of the canvas if desired.
 Step 7. Adhere the leaf as shown. Using Martha Stewart's scary fence punch, punch a fence shape out of black cardstock and adhere to the bottom of the ATC. Adhere the poison label to the bottom right corner of the ATC. Ink the edges of the ATC with black ink. Add a metal "Autumn" brad (from Recollections).


