Welcome to the first Technique Hump Day! Stay tuned for a giveaway!
Today's technique revolves around coloring your plain black and white rubons to match your project. We will be using two different methods, paint and alcohol ink. I colored black rubons using paint in this layout to make the title "I Am" stand out:

Step 1 - Gather. I am using rubons from Art Warehouse (black) and Making Memories (white) and paint and alcohol ink from Ranger Industries. In addition, you will need a paint brush or foam brush, a piece of Cut and Dry Foam or other alcohol ink applicator, and a rubon tool or applicator.
I am using both the hollow and solid rubons from Art Warehouse: If you look at the back of your rubons (the side that transfers to the paper) you'll notice that the rubon adhesive extends beyond the rubon. In this technique, we are actually colorizing the rubon adhesive. You'll see what I mean.
 Step 2 - Paint. We're going to try the paint variation first. Brush a thin layer of paint on the back of your rubon (the side that transfers to the paper). Don't worry about "going outside of the lines". Allow the paint to dry BRIEFLY, until just dry. In fact, places where the paint is thicker may still be tacky or wet:
 Step 3 - Apply. Turn your rubon over and use your favorite rubon applicator to apply it to your paper, just as you normally would. Note that the rubon may be slightly harder to transfer than normal. Just take it slow. Rub a portion and then peel up the plastic slowly to see if it transferred, then rub a little more.
 Note: If your rubon has hollow portions, like mine does, you have two options. If you rub this portion of the plastic, some of the paint will transfer, giving you a distressed look or a textured look if you are using textured paper. If you do not want paint to transfer from these hollow areas, confine your rubbing to the black portions of the rubon:
 Ta-da. You have a colorized rubon, perfect for whatever project you're working on. The technique works the same for the solid black rubon:
Step 1 - Gather. Same as above.
Step 2 - Ink. Place a couple of drops of alcohol ink on the alcohol ink applicator of your choice, I like Cut and Dry Foam. Cover the back of the rubon with alcohol ink, again, don't worry about "staying inside the lines":

 Step 3 - Apply. Apply just as before. Again, the rubon may be a little harder to transfer than normal, it just takes a little patience. If you are having a lot of trouble, the flat end of the Basic Grey Rubon Roller seems to do a good job in this instance. You may notice that the alcohol ink variation of this technique gives you a neater final product than the paint variation, it's all a matter of the final look you want:
 And here's the alcohol ink variation done with the solid black rubon:
 Now we're going to try colorizing white rubons. The technique works the same way as described above. Here are what the results look like (this time using blue paint and ink):
 On white paper (z - alcohol ink; q - paint):
 On black paper (z - alcohol ink; q - paint):
 You'll notice that the alcohol ink variation on white rubons doesn't show up real well on dark paper, but it works really well on light colored paper. Also the paint variation with white rubons results in a distinct distressed effect.
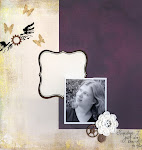
And one additional thought on colorizing rubons. I've noticed that some white rubons go on really washed-out, they barely show up at all. In this case, I find that going over them (after they are applied) with a White Uniball Signo pen, really helps them stand out. I did this with the butterfly on this layout:
 And I ended up with a really cool two-toned effect.
 I really hoped you found this first hump-day technique both helpful and inspiring!
Ok, now for the giveaway. In honor of my first technique hump-day, I am giving away the supplies used in this technique including: black and white rubons (manufacturers may vary), paint and alcohol ink, and a white Uniball Signo pen, an approximate $35 retail value. All you have to do is leave a comment to this post (see the link at the bottom of this post) and tell me 1) a technique you would like to see me post (paper or digital) or 2) your biggest scrapbook related frustration. And, if you tell me your favorite color, I'll customize the paint and ink to YOU. I'll pick a winner randomly on Thursday.
Please feel free to spread the word around!


