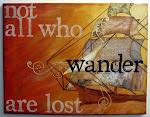
Sorry all. I wasn't able to get a technique post sceheduled for hump day today before I left for vacation. While you're reading this I am probably white water rafting the Nolichucky River, wish me luck. I'll make it up to everyone in the next few weeks. I have some great techniques planned! (and I'll probably have some pretty awesome pictures to post) In the meantime, have a safe and happy week and see you next hump day.
Wednesday, June 25, 2008
Wednesday, June 18, 2008
Mod Podge Crackle
Welcome to technique hump day! Today's technique? An easier way to crackle!
Ok, I discovered this one completely by accident (sometimes the best designs are complete accidents). You are probably familiar with crackle medium. If you're not, here's how it works:
First you paint a surface, let it dry. Then you cover the painted surface with crackle medium, let it dry. Then you paint the crackled surface with another coat of paint, let it dry. In the end you get a cracked surface the color of your top coat of paint with cracks the color of your bottom coat of paint. The crackle medium is clear. The down sides to the technique? The fact that you first have to own crackle medium (or the new Ranger Crackle Paint)..and...the fact that it can take days for a crackle project to completely dry.
Why is this new method better? Well, it uses Mod Podge, which many of us already have it our stashes. Second, it dries really quick.
Ok, there are a couple of differences in the results. The Mod Podge method doesn't work as well on an already painted surface (it does work, just not as well), so you have to not mind if your cracks are the color of your underlying material. If you do mind, you can always run an ink pad over your finished surface to color the cracks. Second, the results are more subtle...the cracks are smaller. This is a cool result though...keep looking.
Here's how it's done. Get a piece of raw chipboard. Brush a coat of Mod Podge on the surface, doesn't seem to matter how thick. Let the Mod Podge dry, at least mostly, it takes about a minute. Then, brush on your chosen paint color. Just as with regular crackle medium, it will take several hours for the cracks to fully develop.
Here are my results:
Using bouncing/circular paint strokes (i.e., no particular direction), remember you can click for bigger picture: Using linear paint strokes (up and down or side-to-side), remember you can click for a bigger picture:
 The linear version of this technique results in a cool wood-grained look and feel, perfect for creating wood-like accents out of lighter weight chipboard.
Thanks for joining me for this Technique Hump Day. Have a great Hump Day!
Sunday, June 15, 2008
ATCs
Recently I've developed an obsession for Artist Trading Cards (ATCs). They are the perfect medium when you feel the urge to create but don't have the time for a "project" or want to get an emotion down on paper before it flies away. Here are my current favs:


 The last two above I made multiples of and used for recent Creating Keepsakes Message Board ATC swaps (themes: favorite quote and Disney villain). The one below was made specifically for a CKMB ATC swap (theme: favorite pet/animal):
ATCs also make the perfect palette for trying out a new product or experimenting with a technique!
Wednesday, June 11, 2008
Border Stamps - Miters, Overlays, and Continuous Stamping
Howdy! And welcome to the second technique hump day (that title just makes me laugh :) ).
Today's technique is using acrylic border stamps. I'm going to discuss how to miter corners, make photo overlays, and stamp continuously.
Don't forget, you can click on any of the photos to get larger, more detailed versions.
Step 1 - Gather. For today's technique you will need acrylic border stamps (I'm using ones from Fancy Pants), acrylic stamping block, stamping ink including StazOn, 2 plain transparencies (the overhead projector type), a 45-degree triangle or another way to make a 45-degree angle, Sharpie, a foam brush or another paint applicator, and a couple of sheets of thin printer/copier paper:
 Step 2 - 45-Degree Template. Use the 45-degree triangle to mark a 45-degree line from 2 adjacent corners on one transparency. Use a Sharpie to mark the lines so that they don't rub off of the transparency. Cut out the marked triangle from the transparency. The resultant transparency (not the triangle) will be used as a template to create mitered stamped corners:


Step 3 - Tear. Tear a corner off of one sheet of the thin printer/copier paper. This sheet of paper serves two purposes. First, if you want to create only a corner adornment with your stamps, stamping onto this torn edge will give your stamped corner a distressed edge. Second, if you want to stamp continuously, this torn edge will help blend one stamped image into another. We're going to create a corner adornment first.
Step 4 - Setup. Alright, here's the only semi-complicated part. Situate the transparency and the torn paper as shown (I have penciled in a 5x7 rectangle that I am creating my stamping around, this could be a photo or any other page or card element): Step 5 - Stamp. Place your border stamp on the acrylic stamp block, ink the stamp, and stamp along the edge of your photo or element, between the transparency and the torn paper. You want your border stamp to extend onto both the transparency and the torn paper. This is what creates the mitered corner and the distressed edge:
 Repeat Step 4 on the adjacent edge. Setup the transparency and the torn paper as shown below:
 Stamp along the adjacent edge of the photo/element, just as you did in Step 5:
 If desired, add additional layers of border stamps by repeating Steps 4 and 5 along both photo/element edges:


 Here's what the finished mitered corner stamp looks like. Notice that, because we mitered the inside corner, the lines of the stamp match up giving you a clean look:
 The photo below shows a photo overlay I created by cutting a plain transparency to the size of the photo, repeating the steps above on the OPPOSITE corner of the transparency, then turning the transparency over and stamping a vine pattern with paint. Combining ink and paint works really well because the paint is mostly opaque and shows up well when laid over ink:
 Here's what the overlay would look like on a photo:
 If you want to create a continuously stamped image, instead of a stand-alone corner, repeat Step 4 with your border stamp (using the transparency if you want a mitered corner on one end, omitting it if you do not):
 Then turn the torn paper over and cover the stamped image. Line the torn edge of the paper up with the ragged edge of the stamped image. The printer/copier paper is thin enough to see through, so you should be able to realign your border stamp and stamp the second portion of the image, giving you a continuous image:
 This technique generally gives you better results than stamping border stamps end-to-end, which gives you various results, like this:
 I hope you found this technique helpful and inspiring!
Thursday, June 5, 2008
First Technique Giveaway
Congratulations magpiefound:
"thanks so much for the tip! i'd love to see tips on using mod podge- alot of times i get lines in it when it dries- you can see the strokes, you know? and my biggest frustration at this very moment is simply lack of mojo! what do you do when you're really so stuck on inspiration that it only frustrates you more to try?? thanks again!ps- my favorite colors are brown and limey green! ;)"
E-mail me your address (anberens@gmail.com) and I will send you your technique package, in LIME GREEN!
Thanks all for the comments!
Wednesday, June 4, 2008
Colorize Your Rubons
Welcome to the first Technique Hump Day! Stay tuned for a giveaway!
Today's technique revolves around coloring your plain black and white rubons to match your project. We will be using two different methods, paint and alcohol ink. I colored black rubons using paint in this layout to make the title "I Am" stand out:

Step 1 - Gather. I am using rubons from Art Warehouse (black) and Making Memories (white) and paint and alcohol ink from Ranger Industries. In addition, you will need a paint brush or foam brush, a piece of Cut and Dry Foam or other alcohol ink applicator, and a rubon tool or applicator.
I am using both the hollow and solid rubons from Art Warehouse: If you look at the back of your rubons (the side that transfers to the paper) you'll notice that the rubon adhesive extends beyond the rubon. In this technique, we are actually colorizing the rubon adhesive. You'll see what I mean.
 Step 2 - Paint. We're going to try the paint variation first. Brush a thin layer of paint on the back of your rubon (the side that transfers to the paper). Don't worry about "going outside of the lines". Allow the paint to dry BRIEFLY, until just dry. In fact, places where the paint is thicker may still be tacky or wet:
 Step 3 - Apply. Turn your rubon over and use your favorite rubon applicator to apply it to your paper, just as you normally would. Note that the rubon may be slightly harder to transfer than normal. Just take it slow. Rub a portion and then peel up the plastic slowly to see if it transferred, then rub a little more.
 Note: If your rubon has hollow portions, like mine does, you have two options. If you rub this portion of the plastic, some of the paint will transfer, giving you a distressed look or a textured look if you are using textured paper. If you do not want paint to transfer from these hollow areas, confine your rubbing to the black portions of the rubon:
 Ta-da. You have a colorized rubon, perfect for whatever project you're working on. The technique works the same for the solid black rubon:
Step 1 - Gather. Same as above.
Step 2 - Ink. Place a couple of drops of alcohol ink on the alcohol ink applicator of your choice, I like Cut and Dry Foam. Cover the back of the rubon with alcohol ink, again, don't worry about "staying inside the lines":

 Step 3 - Apply. Apply just as before. Again, the rubon may be a little harder to transfer than normal, it just takes a little patience. If you are having a lot of trouble, the flat end of the Basic Grey Rubon Roller seems to do a good job in this instance. You may notice that the alcohol ink variation of this technique gives you a neater final product than the paint variation, it's all a matter of the final look you want:
 And here's the alcohol ink variation done with the solid black rubon:
 Now we're going to try colorizing white rubons. The technique works the same way as described above. Here are what the results look like (this time using blue paint and ink):
 On white paper (z - alcohol ink; q - paint):
 On black paper (z - alcohol ink; q - paint):
 You'll notice that the alcohol ink variation on white rubons doesn't show up real well on dark paper, but it works really well on light colored paper. Also the paint variation with white rubons results in a distinct distressed effect.
And one additional thought on colorizing rubons. I've noticed that some white rubons go on really washed-out, they barely show up at all. In this case, I find that going over them (after they are applied) with a White Uniball Signo pen, really helps them stand out. I did this with the butterfly on this layout:
 And I ended up with a really cool two-toned effect.
 I really hoped you found this first hump-day technique both helpful and inspiring!
Ok, now for the giveaway. In honor of my first technique hump-day, I am giving away the supplies used in this technique including: black and white rubons (manufacturers may vary), paint and alcohol ink, and a white Uniball Signo pen, an approximate $35 retail value. All you have to do is leave a comment to this post (see the link at the bottom of this post) and tell me 1) a technique you would like to see me post (paper or digital) or 2) your biggest scrapbook related frustration. And, if you tell me your favorite color, I'll customize the paint and ink to YOU. I'll pick a winner randomly on Thursday.
Please feel free to spread the word around!

