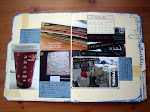
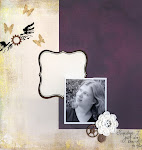
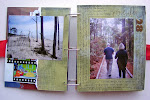
I created a frosted mirrored surface for the covers of my December daily album. Here's a look at the finished product (I haven't put them on the album yet because the Stickles are still wet).
 Here are the products I used for this technique:
(1) 8x10 inch, 0.08-inch thick acrylic from Lowe's (it's in the glass cutting section).
(2) Valspar "Frosting" spray paint. I bought mine at Michaels. Krylon also makes a frosting spray paint. The results look like faux etched glass when used on acrylic.
(3) Grafix Silver Metallic Film. Here is where I bought mine.
Step 1: Wash both sides of your acrylic with a mild, grease-cutting dish soap. If you have grease on the acrylic from your fingers, the spray paint will not adhere evenly. Hold the edges of your acrylic while rinsing. After thoroughly rinsing the acrylic, lay each piece on paper towels to dry the bottom side and dry the top side with a coffee filter.  Leaving the acrylic pieces on the paper towels (to avoid touching them) carry them to your work surface. You may want to consider marking which piece is the front and which is the back (I marked the paper towels).
  Step 2: Decide what design you want to create on your acrylic pieces. Anything you add to your acrylic pieces at this point will act as a mask to the frosting spray paint. You will be able to see through these shapes to the mirrored surface behind the acrylic. I created a design inspired by the Inkadinkado stamps shown here. I created my design using a Heidi Swapp bird sticker and shapes cut with my Cricut and the Joys of the Season and Christmas Cheer cartridges. I ran the Cricut shapes through my Xyron with a repositionable cartridge. (The front cover is on the right and the back cover is on the left.)
 Step 3: Carry your acrylic pieces (on the paper towels) to an area you can spray paint in. Carefully remove the pieces from the paper towels and place them on newspapers. Following the instructions on the spray paint can, apply two heavy coats of frosting spray paint. I applied my coats about 30 minutes apart. Here's what the pieces looked like immediately after applying the first and second coats. Note the spray paint becomes more opaque as it dries.
 Here's what the pieces looked like after an hour of drying time:
 Step 5: Use a craft knife to trim off the excess film.
 Step 6: Stamp any swirls or other images that you want to appear to fall behind the mirrored images. Use Staz-On ink. At this point the masks are still in place, we are simply taking advantage and using them as stamping masks as well. Note that Staz-On ink remover will also remove the frosting paint from the surface, so be careful.
 Step 7: Remove the masks. Use Un-du Scrapper's Solution to remove any residual adhesive. The Un-du will not hurt the frosted surface.


5 comments:
WWWWWOOOOOOOOWWWWW!!! This is totally awesome!
love it! thanks for sharing...
that's awesome.
tfs
making mini albums
mini album blog
.
This is gorgeous, thanks for sharing your techniques.
OK I know what Im making my SIL now for christmas.
Post a Comment