





Happy New Year! Here's to a Happy 2012.
2011 was a rough year for us; for reasons so personal they can not really be discussed in this format. 2011 was such a year that I do not even clearly recall the "One Little Word" I selected. It might have been "grow" but I honestly do not recall.
(If you are not familiar with "One Little Word" click here for Ali Edwards' posts, they're the ones that got me started.)
It was difficult for me to identify a One Little Word for 2012. I wanted so many things from the year, healing, growth, progress, joy...
I found PERSPECTIVE and it seemed to fit the bill. I will attempt to count my blessings and maintain PERSPECTIVE in all things.
Step 1. I have woefully neglected my creative side during the last year. But, as in all things, my creative side has evolved since last I attempted to chronicle it in this format. Therefore, very soon, you will see some changes to this blog. It will transition from being a scrapbook-based technique blog to being a guidebook for my personal creative journey. I am signed up for a ceramics art class during winter semester, keep an eye out for those projects.
Step 2. Yet to be determined. I'm making this up as I go along.
Sunday, January 1, 2012
One Little Word

Monday, July 25, 2011
Drawing 1 Class - Day 12
Final drawing. Charcoal on Canson, two days. Pick six spatially related objects from the pile and draw and shade them.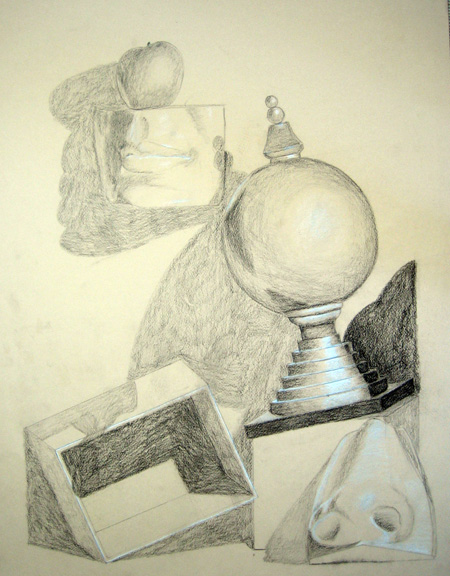
Drawing 1 Class - Day 11
Drapery.
Ok, this is one of the hardest things I've ever had to do, art-wise. It was frustrating and time consuming but I'm happy with the results.
Charcoal on Canson, two days.
Sunday, July 24, 2011
Drawing I Class - Day 10
Shading for plane change, charcoal on white paper, one day.
The purpose of this drawing was to practice our ability to make minute changes in shading with a limited number of pencils. Each plane was to be shaded differently.

Saturday, July 23, 2011

Drawing 1 Class - Day 7
Shading for light, drawing 1. This drawing was also a two-day event, and our first foray into charcoal. Previous drawings were done with graphite.
Friday, July 22, 2011
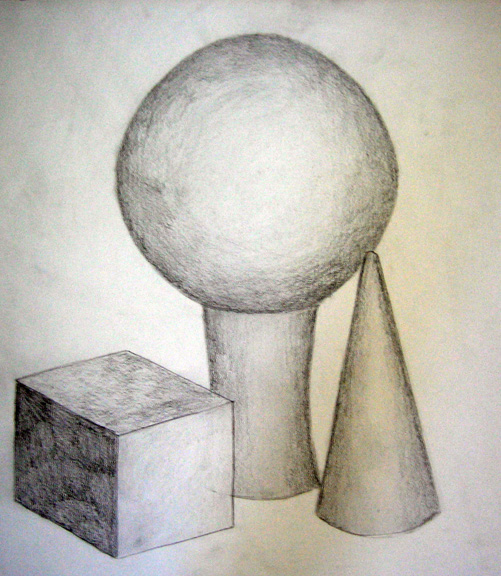
Drawing 1 Class - Day 5
Class 5, which was really two days, was all about perspective. We were required to draw a hallway at the college with correct proportion and angle based on our perspective. I was sitting to the right of center in this particular hallway, which made it a bit more challenging:
Thursday, July 21, 2011
Drawing 1 Class - Day 4
The focus for this class was negative space: There is a ladder and a stool in the background with another stool coming out of the ladder toward the viewer.
Drawing 1 Class - Day 3
Day 3 focused on circles and ovals. We were required to draw three "pouring-vessels" (aka, jars) in correct proportion.
Jar 1: Jar 2 (which is really a watering can):
 And Jar 3 (which my mother should recognize, she gave it to me :) ):
Wednesday, July 20, 2011
Drawing 1 Class - Day 2
On day 2 we did a number of contour drawings. If you're not familiar, contour drawings are done by drawing the outline of your subject while following the outline with your eyes, very little looking at your paper, no measuring for proportion.
Here is my contour drawing of my left hand with object: These are blind contours (no looking at the paper):
 This is a wrong handed (for me left-handed) contour:
 And these are my figure contours: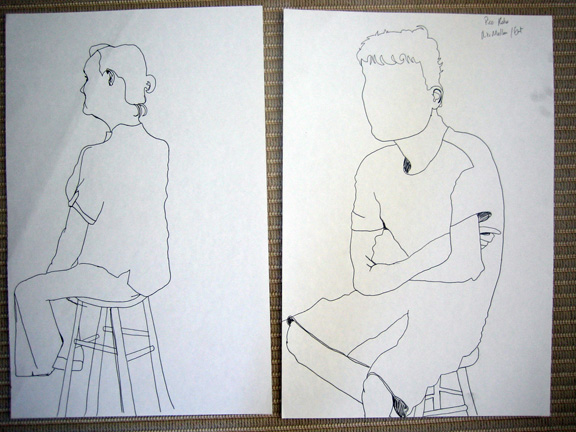
Drawing I Class - Day 1
This summer I took a Drawing I class at the local college. I'll be posting my class-by-class drawings over the next few days. Today....the FIRST class.
Giving us no instruction, our instructor provided us one pencil and a sheet of white paper and asked us to draw the still life in front of us: After 30 minutes of instruction on measuring and proportion, he asked as to redraw the same still life:
 He kept both of these drawings until the end of class. So that we could compare where we are with where we were.
Sunday, July 3, 2011

The universe speaks...
After nearly six months of disuse and accumulation, I clean off my studio tables to find this on the underlying paper covering... You're welcome. I'm glad you're clean now too.
So, in the last six (uhm, plus) months, I've missed blogging the following:
Friday, December 3, 2010
Still here...
As soon as I get through finals, I'll start posting my December daily pages. Oh, for those who don't know, I started a Ph.D. program this fall, that's why my blog has been suspiciously vacant. Just five days to go and I'll be back in action.
Wednesday, November 3, 2010
One Last Halloween Hurrah
Well all, I apologize....I'm obviously not going to make it to 13 tags for Halloween. But here's one more Halloween project for your scrapping pleasure.
I created this in response to a Challenge at my local scrapbook store. We were provided a kit with the mini album, paper, two alpha sets, ribbon, die cut stickers, glitter, die cut bats, and a manila tag. I wasn't able to do everything I wanted to with the kit, ran out of time, but here's the gist.
I split the middle pages of the mini album in half so that I could create a pick-a-pumpkin face book:


 Because of the split, you could flip the eyes/noses and mouths separately to create a unique pumpkin face:
 Background pages were created using a pumpkin mask (cut with Cricut), Glimmer Mist, and Distress Ink. Pumpkin faces were cut with the Cricut.
Thursday, October 28, 2010
Money Saving Technique
So, I'm working on a larger project....really wanting to use some printed tape to cover a chipboard box, but looking at the 1/2-inch roll that cost me $8 and thinking there's no way. So, then I got an idea...
Step 1 - This is the hardest part. Cut a non-stick craft sheet down to a size that will run through your printer. I cut a Ranger sheet in half so I now have two 9x15 pieces.
Step 2 - Cover the craft sheet lengthwise with strips of masking tape. I used 2-inch strips because I'm working on a larger project. Step 3 - Run it through your printer, I printed Christmas sheet music on mine. Experiment with your paper settings to find one that uses less ink. DO NOT print as a photo, it will take forever to dry.
 Step 4 - Heat set the printer ink. When dry, peel the strips off and use as desired.
 Here's a photo of the beginning of my project:
 Disclaimer. I assume no responsibility for any damage you may cause to your printer. I abuse my printer on a regular basis and therefore know what I can and can not do to it. Do not try this if you are unsure how your printer will handle this technique.
Sunday, October 10, 2010
13 Tags of Halloween - Tag 6
 Stamp text onto tag and distress ink edges. Emboss with swirl embossing plate. Ink and then sand embossed swirls. Cover both sides of grungeboard with text paper. Die cut leaves from covered grungeboard. Ink edges of leaves, curl leaves with fingers. Ink chipboard letters and cover with Stickles. Adhere all pieces to tag.
Saturday, October 9, 2010
GO RAYS!
 Well, we lost this one (Game 2), but we won Game 3. We have tickets to Game 5, so here's to Game 4.
GO RAYS!
