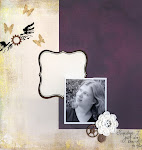
Hey everybody. Veronica left me a comment asking how I made the background in "Fairy Godmother Wings" (posted below). So I put together a how-to. Also, in answer to Nancy's question, yes the wings (and the crown) in the LO were grungeboard.
Please don't be scared of the number of steps. I just wanted to be as detailed as possible!
Step 1 - Gather. Gather scraps in the color palette you want to work with. I chose blues, greens, neutrals, and a bit of purple. Don't worry if the colors are brighter or darker than you want, we'll tone them down later. You will also need a 12x12 piece of cardstock to build on. Choose something in your color palette as a small portion of this cardstock might show. I am using Bazzill cardstock and a mix of patterned paper scraps from Basic Grey, K&Company, and Die Cuts with a View. Step 2 - Tear and Arrange. Tear your scraps into workable sized pieces. I tore mine so that the white core would show, but it's up to you how you want to tear your scraps. Move the scraps around on the background cardstock until you are happy with their placement. Keep an eye on balancing your colors (spread out your dark and your bright colors).
 Step 3 - Adhere. Adhere your scraps to the background cardstock. Only put adhesive in the middle of your scraps so that you can tuck other scraps under as you go.


 Step 4- Trim. Once all of your scraps are adhered, turn you cardstock over and trim your scraps to the size of the background paper.
 Step 5 - Ink. I used Tim Holtz/Ranger distress inks. I used "Old Paper" to age my scraps overall and I used "Brushed Corduroy" on the edges of the scraps, particularly the white, torn edges, and along the edges of the entire piece. Don't worry if your torn edges roll up, this will get taken care of in the next step.

 Step 6 - Whitewash. Mix your whitewash by combining 1 part antique white acrylic paint with one part water. If you use scrapbook specific acrylic paint (like Ranger's paint daubers or Making Memories) you may need to add more water. I used Folkart acrylic paint by Plaid in Vintage White. I used an antique white instead of a white because I wanted an aged look. Use a clean foam brush to apply your whitewash, do not use the foam brush you mixed the paint/water with or you will be applying it too thick.
 This is what one coat of whitewash looks like:
 This is what two coats of whitewash looks like. I stopped at two coats.
 Step 7 - Wait. Allow your whitewashed paper to dry for at least 2-3 hours. You have added a lot of water to the paper. Only time will get it back out. In the meantime, if you used a craft sheet to paint on, the whitewash wipes right off with a paper towel.
 Step 8 - Roll. As the paper dried, the edges of the scraps have come loose. If some haven't because they are painted down, go ahead and pull them up carefully. You want free edges for this step. Once your edges are free, roll the torn portion of the edges by rubbing your fingers against the edge toward the center of the scrap.

 Step 9 - Adhere some more. Adhere down the loose edges of your scraps until you are happy with the look.
 Step 10 - Thread some water. Use the Fiskars Threading Water punch to scallop your edges. In order to get neat corners, measure 7/16 of an inch in from each edge. Make sure a scallop-hole falls at the intersection of these measurements. I used a Sharpie to mark where the scallop-holes were along the back rail of my punch, this makes alignment easier. Because you will be punching through 3 layers in some places on this project, you will need to sharpen your punch every 3-5 punches. Sharpen the punch by punching through aluminum foil 2-3 times.

 Veronica, thanks so much for the question. If you e-mail me (anberens@gmail.com) your address, I will send you the background paper I made for this demo!


2 comments:
Amanda, this is delicious. You are a superstar. Thanks for sharing.
This is so cool! You are amazing! Thanks.
Post a Comment