Ok, so I was supposed to have a two-day stay in the hospital. Things did not go as planned. Let me say first that I am home and healing.
Minor surgical complications led to my hospital stay being extended to 3 days right from the beginning. The complications basically made the surgery last longer, which led to more bleeding, so they wanted to keep me an extra day as a precaution.
Pain management issues led to extending my stay one more day.
Blood clots in my arm resulting from multiple IVs almost led to another full day. The blood clots ended up being small and in peripheral veins so I was able to come home late Thursday night.
The surgery ended up being more extensive than I originally envisioned. I had had open abdominal surgery before, so I was thinking that laproscopic surgery would be a walk in the park in comparison. Apparently this isn't true, the main difference seems to be the amount of time you get off work.
I hope to resume posting this weekend, lots to share. Thank you all for your well wishes and prayers.
Friday, December 18, 2009
The best laid plans...
Sunday, December 13, 2009
Off I go...
Tomorrow is the day. I'm off for surgery. Send me happy thoughts.
I won't be coming home until Tuesday at the earliest. I hope to resume posting on Wednesday.
Saturday, December 12, 2009
December Daily - Page 17
 Page 17 displays the three Christmas wrapping papers I selected for this year. I simply adhered the papers to the back of Clear Scraps ornament shapes with Glossy Accents, added silver eyelets, and adhered silver ornament hangers (also with Glossy Accents).
Friday, December 11, 2009
December Daily - Page 16
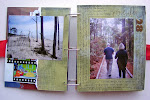
 Page 15 consisted of an embellished 5x7 photo mounted on a page protector. To create page 16, I simply mounted a 4x6 photo on a 5x7 photo mat behind the previous photo. Before adhering it down, I embellished the edges of the photo mat with a Martha Stewart edge punch.
Thursday, December 10, 2009
The tenth tag of Christmas
Here is my take on the tenth of Tim Holtz's 12 Tags of Christmas. I think this one might be my favorite so far. Very modern.
Taking a night off from the December Daily. Come back tomorrow for my next daily post.
Wednesday, December 9, 2009
December Daily - Pages 14 and 15
Two photos of my Christmas lanterns with a few Making Memories confetti words... and the closing bling flourish from the previous page.
The ninth tag of Christmas
Here is my take on the ninth of Tim Holtz's 12 Tags of Christmas. This one is totally for my mom. Yes, that is me in the photo, circa 2-years-old. I was not pitching a fit, Santa's fake beard was merely tickling my nose.
Tuesday, December 8, 2009
Monday, December 7, 2009
Sunday, December 6, 2009
December Daily - Pages 8 and 9
Pages 8 and 9 are a two page spread.
On the back of the "December" calendar page, I placed a piece of patterned paper cut to size and a matted 5x5 photo (with brush by Christine Borgfeld). In front of page 9 I added a "1" chipboard piece from 7Gypsies. I covered the chipboard piece with embossed Bazzill and added Hiedi Swapp rubons and a stamped embossed frame (Unity stamps).
Saturday, December 5, 2009
December Daily - Pages 6 and 7
Page 6, easy peasy. I adhered a cropped 4x6 photo on the back side of the clear tabbed page, framed by the kraft envelope. I printed a quick title on a Fontwerks label by adhering the label to a piece of printer paper (where I had already printed the title) and putting the paper through my printer again.  Page 7. Another Jenni Bowlin calendar card.
Friday, December 4, 2009
December Daily - Page 5
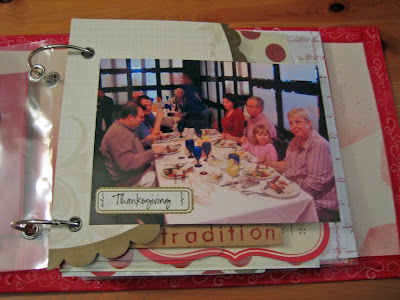
 To make page 5, I adhered a Maya Road envelope to a clear acrylic tabbed page from Zutter. I stamped "tradition" on the outside of the envelope. Inside the envelope is a little flip book I made to hold photos of our favorite Thanksgiving specials.
Thursday, December 3, 2009
December Daily - Page 4
 On the back of the 5x7 photo on Page 3, I adhered a 5x7 patterned paper photo mat (Little Yellow Bicycle) with my day-after-Thanksgiving menu printed around the edges. I then nestled a 4x6 photo in the middle of the mat, with a little "home sweet home" sticker.
On Thanksgiving Day we had done dinner out with my in-laws, on the day-after-Thanksgiving, we had a more traditional Thanksgiving dinner, just the two of us, at home.
Wednesday, December 2, 2009
December Daily - Pages 2 and 3
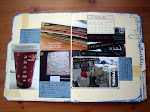
I like to start my December Daily album with Thanksgiving, because that's really when the holiday season starts for me. On the back of Page 1, I added a Jenni Bowlin November 2009 calendar. You can see in this photo that Pages 1 and 2 were built on a page protector. I added trimmed transparencies to all of my page protectors so that I could use them as clear pages instead. The front of the next page is a photo from Thanksgiving. The photo is adhered to a trimmed die cut paper.
Tuesday, December 1, 2009
First Tag of Christmas...
Here is my take on the first of Tim Holtz's 12 Tags of Christmas. I'm making mine ATC sized. I used an Inkadinkado stamp and black glitter Zing embossing powder.
December Daily - Page 1
On the opening page of my December Daily album I used a photo of some of my Christmas decorations (decorated lanterns) matted with red cardstock. I digitally added a poem and an edge brush to the photo. I added Thickers for the year (covered in Glossy Accents to keep the glitter from getting everywhere). The patterned paper label shape backing the year is actually the back of the following page, but it provided a perfect spot for the chipboard numbers. Remember, you can click the photo for a larger version. You can see my other posts regarding this album here (cover), here (binding), here (alterations), and here (base pages).
Monday, November 30, 2009
Method Playground Challenge 55
Method Playground challenge 55 was my first issued challenge as a Design Team member. I have challenged you to design a layout using negative space, in any way you choose. Negative space is that space "around" a shape. For example, the left overs after you punch out die cuts or chipboard letters. Negative space is that space which defines a shape, without being the shape.
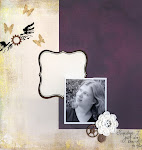
You can check out all the Design Team members creations here. I chose to create a spray inked background using a mask I made from a photo of myself. Here's how it turned out: You can see the use of negative space in that I did not create the shape of my face, instead I created the space around my face and the surrounding shadows.
Here is how I did it (the first four steps use Photoshop Elements 6). Remember, you can click on the photos for larger views:
Step 1 - Open the photo you want to use and crop it to the size of your background. I cropped my photo to 12x12. Step 2 - Create a threshold adjustment layer by going to -->Layer -->New Adjustment Layer -->Threshold.
 Step 3 - Name your new layer and click "OK".
 Step 4 - Vary the Threshold Level until you get a look you like. The higher the number, the more black, the lower the number, the more white. Remember, we're going to be cutting out the white portions to use as a mask, so you want a Threshold Level that gives you large, somewhat connected sections of white.
 Step 5 - Print your Threshold photo on medium weight cardstock. If you do not have a wide format printer you can print a smaller photo, you'll just have more background in the final product.
 Step 6 - Use a craft knife to cut out the white sections of the photo. Make any adjustments to the photo you think are necessary. Note, now is not the time to give yourself that nose job you've always wanted, you still want the photo to look like you, but you can remove distracting background objects, for example (I removed my hand from the upper left hand corner).
Try to keep your white sections large and semi-connected. I ended up with three large white sections. The more pieces you have, the more time you will spend trying to piece them back together in the correct locations (unless you like that Picasso look). Step 7 - Using temporary adhesive, adhere you mask to your background paper.
 Step 8 - Using spray ink (I used Adirondack Color Wash in Plum and Glimmer Mist in Dewberry) cover your entire background paper. (Note: after this photo you'll notice I switched background papers, I liked the tone-on-tone result better than the on-white result).
 Step 9 - Remove your mask, blot with paper towels, and let dry.
 Step 10 - I chose to add some additional texture. I re-adhered my mask and stamped a text stamp repeatedly over my background/mask using black Staz-on ink.
 Step 11 - I then stamped again using a Tim Holtz circle stamp and Distress Embossing Ink. I embossed the images as I went with clear embossing powder.
 Step 12 - I added photos, stitching, and a title. And here's the end result:
 Come on over and play with us at Method Playground. This challenge will be active until December 13.


