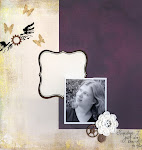
I created this layout for Method Playground Challenge 62 - Heat Embossing.
You don't need a stamp to emboss an image. For this layout, I punched three rows of "birds on a wire" from white cardstock using the new Martha Stewart punch. I then rubbed my punched images with embossing ink, poured on black embossing powder, and heated. I was really happy with the slightly distressed/faded on the edges look. It you want a more finished look, you can add a second layer of embossing ink and powder to fill in the bald spots. The heart was hand cut from my own collages and inked with Black Soot Distress ink around the edges. The title is Colorbok glitter rub-ons. Background Paper is Basic Grey "Frosting".
Monday, February 22, 2010
Method Playground Challenge 62
Sunday, February 21, 2010
In progress...
Was hoping to get this piece done this weekend, but I have been unexpectedly called out of town by my day job. Have to leave soon and drive to south Florida tonight. So I thought I'd share an "in progress" glimpse.
Wednesday, February 17, 2010
Collage Flowers and Giveaway!
For the most recent Method Playground challenge, I created some collage flowers for my layout: Here's a step-by-step on how to create these flowers. Scroll all the way to the bottom to see how you can win some!
Step 1 - Create a collage background from paper scraps in a color theme. Add ink, paint, stamps, etc., as desired. I used black, white, and gray paper scraps, Black Soot distress ink, and a graph stamp. See this post for more instructions on creating a collage background. Use light weight 12x12 cardstock as a base for this collage.
 Step 2 - Cut your collage into 1 x 12 inch strips. Because of the thickness of the multiple layers of paper, your paper trimmer may not cut all the way through. Use scissors to finish the cuts if needed.
 Step 3 - Because of the multiple layers of paper, your strips will be rather stiff. Make them easier to work with by rolling each strip four times, twice from each end (once with the front side up, once with the back side up).
 Also bend your strips lengthwise, both upwards and downwards.
 Step 4 - Starting at one end, fold the strip over approximately 1 inch.
 Step 5 - At the base of the first petal, fold the strip again, offset from the first petal.
 Step 6 - Fold the strip over again, at approximately one inch, creating the second petal.
 Step 7 - Repeat steps 5 and 6 to create three more petals.

 Step 8 - Lay the flower on the table and press down to flatten the folds.
 Step 9 - (Photo is looking at the back of the flower) Glue the first fold (the first petal) together, then glue the overlapping portions of the remaining petals together. Use glue dots or a heavy duty glue like Glossy Accents.
 If you used a wet adhesive, place the flower under a heavy object to dry. (This photo has a very Wizard-of-Oz feeling to it!)
 Step 10 - Lay the bottom side of a 1/4-inch grommet (found in the notions section of craft stores) in the middle of the flower and trace the inside.
Tuesday, February 16, 2010
Canvas Pennant Kits
Canvas Pennant Kits are now available in my Etsy store. Kit includes:
- 6 x 5.5-inch double sided canvas pennants, with stiff 1/8-inch batting and silver toned grommets
- 12 - 10-inch torn raw muslin ties
- 2 - yards of 100% raw cotton braided cord for hanging
- 2 - 2-inch silver toned rings for binding
Monday, February 15, 2010
...with a Twist
Here's the twist to the pennant banner shown in the previous post. Because I covered both sides of stiff 1/8-inch batting in canvas, the banner can be bound into a really cute mini book after use.
I tied the muslin hangers to two 2-inch book binding rings. I placed the last pennant first in the book as a title page. Then I added photos to the back sides of the pennants, which are embellished similarly to the fronts.

 I you temporarily adhere the letters to the fronts of the pennants, you can use both sides of the pennants for photos. Or skip the banner all together and just make a mini-book!


Sunday, February 14, 2010
Canvas Pennant...with a Twist
I've been working on a canvas pennant banner project... with a twist. Here is my finished pennant banner: Each pennant is approximately 6-inches tall. Each pennant is made of stiff 1/8-inch batting with raw canvas duck on both sides and two silver toned grommets for hanging. I decorated my pennants with two shades of Glimmer Mist (Starfish and Tuscan Sun), Basic Grey ribbon, felt flower ribbon, white embossed circles, corduroy circles, corduroy butterflies, Stickles, and glitter chipboard. The hangers are raw cotton muslin sprayed with the same colors of glimmer mist. The hanging cord is braided 100% raw cotton cord.
Click on the photos for larger images.
Monday, February 8, 2010
Method Playground Challenge 61
Challenge 61 at Method Playground is to use ruffles on your layout. Now, for those of you who have been round here for a while probably know, I'm not much of a ruffle girl. I was to the point of seriously considering my husband's suggestion of gluing potato chips to my layout (you know, "Ruffles") when I started wondering if there was a way to make "urban" ruffles. So I created a black-white-gray paper collage with the idea of ruffling strips from that. I was much happy with my final result: Instead of creating just ruffles, I offset each layer of the ruffle slightly to created a flower shape. The collage paper base lends alot of interest to the final result.
Also, in case you're wondering, the title is a play on words (read the journaling, you can click on the photo for a larger version).
Wednesday, February 3, 2010
Still here...
I'm still here....just mid-project on many different projects. Here's a sneak at one... Be back with finished projects soon!

