Here is my final Art Journaling 301 book (except the title, still working on that):



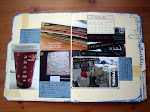
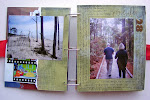



Here is my final Art Journaling 301 book (except the title, still working on that):
The last class of Dina Wakley's Art Journaling 301 class covered binding using the coptic binding method. My binding isn't perfect, seems I may need to practice the technique a few times. One end of my book is bound a little tighter than the other end. And I think I might have messed up the method for attaching the back cover. But, it is what it is and it looks and works just fine. Tomorrow I will post photos of the entire book.


Here's how I created the layout I made for Creative Therapy's catalyst 87 (see this post for more information). Step 1 - I collaged strips of patterned paper (Basic Grey) with vintage dictionary and atlas paper.
 Step 2 - Using repositionable adhesive, I adhered a clip art dancing girl. The clip art dancing girl I cut from a piece of medium-weight cardstock with a craft knife.
 Step 3 - I randomly sprayed blue, purple, and gray spray ink (Glimmer Mist and Adirondack Color Washes) onto my background. I blotted the spray ink with a paper towel to tone down the dark colors slightly and to add a bit of texture to the spray ink background. The distressed looking edges I created by lightly going over my sprayed edges with a wide wet paintbrush.
 Step 4 - Remove the clip art mask.
 Step 5 - I added a piece of handmade paper that I think resembles a moon. I also sprayed a "ground" for the dancing girl using a dark gray spray ink and a straight edge as a mask.
 Step 6 - Using a small wet paintbrush, I spread out any ink that seeped under my mask to make the overspray look like shadows.
 Step 7 - I added a second "moon", sprayed over it with gray spray ink, and add charcoal to make it look like the moon was reflecting.
 Step 8 - I added a title with stamps, Staz-On white ink, my handwriting, and a Sharpie poster paint pen.
I have deviated from the class instructions in creating my covers. For those who know me, you're probably wondering why it took so long.
Dina's suggestion was to use the paint colors we used in out journal to paint the cover. And I did, but the all-over bright oranges, greens, and pinks I used were just too overwhelming for the introspective theme of the journal (in my opinion).
So instead, I covered my covers with the brown shipping paper I had been using to protect my work surface while creating the journal. I thought it perfectly supported the "Graffiti of My Life" theme of the journal. And it was covered in all the paint and ink colors and stenciled shapes I had used in my journal.
I cut out some star shapes from the brown paper, so you can see portions of my painted covers, added a bit more stenciling, and hand stitched around the stars. Still deciding on my title.
Front cover: Inside front cover:
 Inside back cover:
 Back cover:
Class 6 of Dina Wakley's Art Journaling 301 class was adding hinges to our loose pages to create signatures. I had to fix my journaling in a few spots where the hinges ended up covering up portions of the words.


 Look for the results of Class 7 (creating the covers) Wednesday!
Method Playground challenge 54 is up! You can view all the DT layouts and submit your own here.
Challenge 54 is create your title with ribbon. I adhered strips of ribbon to a chipboard letter to create a portion of my title. I used this technique because I thought the strips of ribbon nicely complemented the stripes on the hot air balloons in my photos. I thought it might be fun to show you some of the other iterations I went through with my title design and placement.
This first iteration is colorful and fun, but just a tad too busy for my taste: Then I tried toning down the title to just one word. But then I lost the visual triangle I had between the title elements, although you still have a visual triangle between the colorful background paper elements and the colorful title.
 This last iteration was the one I ended up using. Once I stamped in the rest of the title, I ended up with a visual triangle between my black title elements and another one between the colorful background paper elements and my striped title element.
Here is the Christmas wreath I made for this year: Here is how I put it together:
Step 1 - Wire the light battery packs to the back of the wreath, in a position where the on/off switches are easily accessible. Keep in mind that the battery packs are heavy, so wherever you place them will become the bottom of the wreath. Push the light bulbs through the wreath from back to front so that the light wires are hidden by the bulk of the wreath.
 Ste 2 - Add two evergreen sprigs. Bend the sprigs so that they follow the curve of the wreath. Place the springs so that they point away from each other. Wire the sprigs to the wreath.
 Step 3 - Decorate your wreath. I used candy and berry garland around the entire wreath and red hydrangea and pine cones at the focal point (at the base of the evergreen sprigs).
 Details:
 Step 4 - Hang and enjoy.
 It's beginning to look a lot like Christmas...
Here is the second half of my finished Art Journaling 301 pages. You can see the first half in this post.


Made this piece in response to this week's prompt over at Creative Therapy. This week's prompt was "If money weren’t an issue what would you do with your time? (career or otherwise.)". With the piece I was trying to express not one thing I would do, but the lifestyle I would lead. I would travel, create, read, take classes, and just be free to pursue the impulse of the moment. The piece doesn't quite feel finished yet, I may add a few more layers.
 Yes, I dropped an ENTIRE jar of gesso on my right foot. This is about halfway through the cleaning process (after attempting to scrape up all of the still usable gesso). Unfortunately, I didn't get any photos of the footprints I left between my studio and the laundry room. Amazingly, it all came out of the carpet (and my clothes).
This is why they don't give engineers paint.

