Method Playground challenge 55 was my first issued challenge as a Design Team member. I have challenged you to design a layout using negative space, in any way you choose. Negative space is that space "around" a shape. For example, the left overs after you punch out die cuts or chipboard letters. Negative space is that space which defines a shape, without being the shape.
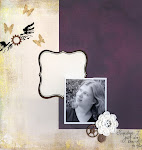
You can check out all the Design Team members creations here. I chose to create a spray inked background using a mask I made from a photo of myself. Here's how it turned out: You can see the use of negative space in that I did not create the shape of my face, instead I created the space around my face and the surrounding shadows.
Here is how I did it (the first four steps use Photoshop Elements 6). Remember, you can click on the photos for larger views:
Step 1 - Open the photo you want to use and crop it to the size of your background. I cropped my photo to 12x12. Step 2 - Create a threshold adjustment layer by going to -->Layer -->New Adjustment Layer -->Threshold.
 Step 3 - Name your new layer and click "OK".
 Step 4 - Vary the Threshold Level until you get a look you like. The higher the number, the more black, the lower the number, the more white. Remember, we're going to be cutting out the white portions to use as a mask, so you want a Threshold Level that gives you large, somewhat connected sections of white.
 Step 5 - Print your Threshold photo on medium weight cardstock. If you do not have a wide format printer you can print a smaller photo, you'll just have more background in the final product.
 Step 6 - Use a craft knife to cut out the white sections of the photo. Make any adjustments to the photo you think are necessary. Note, now is not the time to give yourself that nose job you've always wanted, you still want the photo to look like you, but you can remove distracting background objects, for example (I removed my hand from the upper left hand corner).
Try to keep your white sections large and semi-connected. I ended up with three large white sections. The more pieces you have, the more time you will spend trying to piece them back together in the correct locations (unless you like that Picasso look). Step 7 - Using temporary adhesive, adhere you mask to your background paper.
 Step 8 - Using spray ink (I used Adirondack Color Wash in Plum and Glimmer Mist in Dewberry) cover your entire background paper. (Note: after this photo you'll notice I switched background papers, I liked the tone-on-tone result better than the on-white result).
 Step 9 - Remove your mask, blot with paper towels, and let dry.
 Step 10 - I chose to add some additional texture. I re-adhered my mask and stamped a text stamp repeatedly over my background/mask using black Staz-on ink.
 Step 11 - I then stamped again using a Tim Holtz circle stamp and Distress Embossing Ink. I embossed the images as I went with clear embossing powder.
 Step 12 - I added photos, stitching, and a title. And here's the end result:
 Come on over and play with us at Method Playground. This challenge will be active until December 13.


 The front of the next page is a photo from Thanksgiving. The photo is adhered to a trimmed die cut paper.


