Welcome to the first Technique Hump Day! Stay tuned for a giveaway!
Today's technique revolves around coloring your plain black and white rubons to match your project. We will be using two different methods, paint and alcohol ink. I colored black rubons using paint in this layout to make the title "I Am" stand out:

Step 1 - Gather. I am using rubons from Art Warehouse (black) and Making Memories (white) and paint and alcohol ink from Ranger Industries. In addition, you will need a paint brush or foam brush, a piece of Cut and Dry Foam or other alcohol ink applicator, and a rubon tool or applicator.
I am using both the hollow and solid rubons from Art Warehouse: If you look at the back of your rubons (the side that transfers to the paper) you'll notice that the rubon adhesive extends beyond the rubon. In this technique, we are actually colorizing the rubon adhesive. You'll see what I mean.
 Step 2 - Paint. We're going to try the paint variation first. Brush a thin layer of paint on the back of your rubon (the side that transfers to the paper). Don't worry about "going outside of the lines". Allow the paint to dry BRIEFLY, until just dry. In fact, places where the paint is thicker may still be tacky or wet:
 Step 3 - Apply. Turn your rubon over and use your favorite rubon applicator to apply it to your paper, just as you normally would. Note that the rubon may be slightly harder to transfer than normal. Just take it slow. Rub a portion and then peel up the plastic slowly to see if it transferred, then rub a little more.
 Note: If your rubon has hollow portions, like mine does, you have two options. If you rub this portion of the plastic, some of the paint will transfer, giving you a distressed look or a textured look if you are using textured paper. If you do not want paint to transfer from these hollow areas, confine your rubbing to the black portions of the rubon:
 Ta-da. You have a colorized rubon, perfect for whatever project you're working on. The technique works the same for the solid black rubon:
Step 1 - Gather. Same as above.
Step 2 - Ink. Place a couple of drops of alcohol ink on the alcohol ink applicator of your choice, I like Cut and Dry Foam. Cover the back of the rubon with alcohol ink, again, don't worry about "staying inside the lines":

 Step 3 - Apply. Apply just as before. Again, the rubon may be a little harder to transfer than normal, it just takes a little patience. If you are having a lot of trouble, the flat end of the Basic Grey Rubon Roller seems to do a good job in this instance. You may notice that the alcohol ink variation of this technique gives you a neater final product than the paint variation, it's all a matter of the final look you want:
 And here's the alcohol ink variation done with the solid black rubon:
 Now we're going to try colorizing white rubons. The technique works the same way as described above. Here are what the results look like (this time using blue paint and ink):
 On white paper (z - alcohol ink; q - paint):
 On black paper (z - alcohol ink; q - paint):
 You'll notice that the alcohol ink variation on white rubons doesn't show up real well on dark paper, but it works really well on light colored paper. Also the paint variation with white rubons results in a distinct distressed effect.
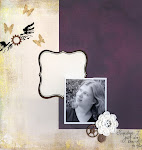
And one additional thought on colorizing rubons. I've noticed that some white rubons go on really washed-out, they barely show up at all. In this case, I find that going over them (after they are applied) with a White Uniball Signo pen, really helps them stand out. I did this with the butterfly on this layout:
 And I ended up with a really cool two-toned effect.
 I really hoped you found this first hump-day technique both helpful and inspiring!
Ok, now for the giveaway. In honor of my first technique hump-day, I am giving away the supplies used in this technique including: black and white rubons (manufacturers may vary), paint and alcohol ink, and a white Uniball Signo pen, an approximate $35 retail value. All you have to do is leave a comment to this post (see the link at the bottom of this post) and tell me 1) a technique you would like to see me post (paper or digital) or 2) your biggest scrapbook related frustration. And, if you tell me your favorite color, I'll customize the paint and ink to YOU. I'll pick a winner randomly on Thursday.
Please feel free to spread the word around!



25 comments:
Thanks for the tip!!!
This looks like a great addition to my library of favorites.
thanks so much for the tip!
i'd love to see tips on using mod podge- alot of times i get lines in it when it dries- you can see the strokes, you know?
and my biggest frustration at this very moment is simply lack of mojo! what do you do when you're really so stuck on inspiration that it only frustrates you more to try??
thanks again!
ps- my favorite colors are brown and limey green! ;)
What a great tip! I just went to my scraproom to try this tip with paint ant it worked so well! Thank you!!!
I would like to see a tip on the many ways to use ink. I love ink pads, but have never ventured in alchol ink. Scary! lol
My biggest frustration is coming up with the 'map' of the layout. I have used a few sketches and that helps, but its so hard coming up with this on my own.
:-) My favorite colors are pink and chocolate brown.
Great techniques! Will add you to my faves.
Thanks for the great tip!! Will be adding you to my faves!!
I would love to see more ways to get me to use my stamps on my layouts!
My biggest frustration is having to fix rub ons that did not adhere properly. How can I fix them without covering them up and starting over?
My favorite colors are lime green and hot pink!
Thanks again for a great tip!
This is fabulous! Your blog is amazing. Thank you for sharing your talent.
I would love to see techniques on creating actions using PSE.
Oops! Forgot, my fav color is green! :-)
Great tutorial!! I'm definatly trying these out. And I'd love to see more with alcohol ink.
1.) Technique I would love to see you do would be doodling.
2.) My Biggest scrapbooking frustration hehehe is never being left alone long enough to create anything..
3.) My favourite colour is blue
Thanks for doing this and hey maybe I'll get lucky after all today is my birthday
First of all, this is just amazing. I would NEVER have thought to do something like this!
I would love to see additional ink usage or distressing techniques. My frustration is more just the inability to find some of the products that I want locally, and I don't like paying shipping unless I'm' buying quite a bit -- so I rarely try new products (such as Ranger inks, etc.).
As for favorite colors -- blue, but I'm open to anything!
I want to see tips on what adhesive works best with acrylic, and using acrylic albums and accents! GREAT blog!
My biggest frustration is not being as organized as I'd like with my supplies. I need creative storage ideas.
Great post - perfect timing. I just picked up some black alpha rubons for like 20 cents at a walmart clearance aisle and wasn't sure what to do with them. Now I have to try this!!!
1 - I'd also like to see you do some work with clear acrylic pages / transparancy pages. I am not sure how to adhere them to cardstock other than staple or cover up the adhesive with another layer of something. I also don't know if paint will stay put on them, or what other things you can do on top...rub-ons, paint, markers??? I've seen rub-ons but do they have to be some kind of special rub-on?
2 - the only frustrating thing is just not having enough time or space in our teeny apartment. i'm not sure how to best organize my space yet but i feel like we're only going to be in our place another year so why stress.
and i guess finding good cardstock locally.
fav colors - all shades of pinks!!! i also like orange and blue (my school colors)
I can't wait to see what you show next week. Thanks for sharing and teaching!
Becky
Arlington, VA
great tutorial...very detailed!
I would love to see instructions on embellishing acrylic books....I have the acrylic, but I am too spooked to start it! lol!
My color of choice would be red or lime green or torquoise...
I already had your blog bookmarked...:)
gina (gg loves matthew)
Great tips...here's my requests:
How to embellish - when to know you are done, what to embellish with (I have a layout, I love the background but it needs more embellishing and I just get stuck.).
How to use glimmer mists, have them work evenly
How to use sheer products, especially the Maya road sheers (including the new 12 by 12 sheer sheets).
How to stamp or do anything (rub ons, etc) in a circle...I have a thank you card I'm making, want to stamp 'thank you' inside a circle, but have trouble lining up the letters evenly.
My biggest frustration right now - getting stuck with a layout, have had it for weeks, and can't seem to finish it...have 3 possible title materials (felt, sizzix cardstock and glitter - and also frustrated because I think I lost 2 of the felt letters, which were die-cut and not sure I can replace (did it at a crop, not my letter set). And also how to embellish that layout.
Favorite colors: bright pastels, teal, pink, tangerine, green, etc.
I absolutely love your blog, I have you on my Google Reader and always enjoy your stuff!
I have tons of ribbon, but am always struggling to come up with new ways to use it, I would love to see your ideas sometime.
My biggest frustration with scrapbooking, besides the lack of mojo, is when I can't find the right embellishments, I never have what I need to get the effect I am looking for.
My fave colors are pink, purple, and green.
Very cool blog, and great info and demo! I would love to see more on alcohol inks as well. My greatest frustration is that I love ribbon, have tons of it, but am bored with the few ways I apply it to pages. I would love to learn more options for using ribbon. My favorite colors are blue and green. I'm bookmarking this one!
I LOVE blogs that include instructions! LOL.
I would like more ideas like this for inks, stamp pads, mists, etc. I get stuck on the one technique that I bought the colorant for and never seem to discover other ways to use it.
Favorite color for this technique would be red - I can see using it on pages for my boys' sports and that's their team color.
very cool technique....have you tried it with prisma's or copics?
Thanks for the great tips. I would love to see info on how to alter raw chipboard. My biggest frustration is storage. P.S. I love blues and browns
Thanks for sharing this incredible technique,I love it! I would like to see any tips on working with acrylic albums. I just did my first one and sugar coated it. I would love to see if alcohol inks would work well on them!
Oh,and I love red,green,and brown!
Wow, that's a fabulous tutorial! So cool, Amanda. I can't wait to try. You're a natural teacher.
cool tip, amanda! this blog is a goldmine :) check back soon.
Post a Comment