Ok, last week I discussed what acrylic albums are out there for sale and how to make you own. If you missed last week's post you can find it here.
This week I'm going to talk about acrylic album binding methods.
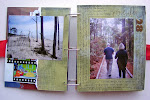
There are three basic methods: ring binding, wire binding, and book binding.
Most acrylic albums that are sold right now are "ring bound". Whether these albums are held together with three rings, one ring, ball chain, a metal post, or ribbon, the method is the same: round holes that are threaded with a ring, chain, or ribbon to keep the sheets of acrylic together. The rings, chain, or ribbon are not connected, but are independent.
Wire binding is similar to ring binding. The differences are that there are generally more holes, the wire binding is fully connected, and it usually requires specialized equipment. As far as I am aware wire bound acrylic albums are not widely available. Although Zutter has just started making acrylic album covers/pages that can be punched and bound with the Bind-it-All.
Book bound albums are albums that are bound with book binding tape, creating a book-type spine. Again, as far as I am aware, book bound acrylic albums are not widely available.
So, since last week I discussed where to buy and how to cut acrylic for your own handmade acrylic albums, this week I'm going to show you how you can bind your handmade album.
Typical acrylic is too brittle to cut with die cutters, the Bind-it-All, or the Crop-a-Dile. If you try, the acrylic will generally crack, if you can get the cutter through the acrylic at all.
So here's my "a-ha" moment of the week.
A while back I started wondering if I would be able to punch through acrylic if I heated it first. Well, I finally gave it a try this week, AND IT WORKS REALLY WELL. Here are the steps to ring bind, book bind, or wire bind your own acrylic album.
I suggest practicing these techniques on a piece a scrap acrylic first, it takes a couple of tries to get a feel for the amount of heat that is required.
First, wire binding with the Bind-it-All.
Step 1- Remove Protective Film. You don't need to remove it completely, but at least peel it back from the area you plan to heat. If you don't it will melt to your acrylic.
Step 2 - Heat. Use your heat gun to heat the edge of your acrylic. The Bind-it-All only punches about 4 inches at a time, so focus the heat only where the punching will occur. Heat one side of the acrylic for 5-10 seconds and then heat the other side for 5-10 seconds. Continue heating until you see the acrylic start to warp slightly. Once warping begins, heat each side approximately 2 more times and you should be ready to punch. Don't worry about the warping, as long as you don't overheat the acrylic, it will flatten back out as it cools.
 Step 3 - Punch. Working relatively quickly, punch your acrylic with the Bind-it-All. Punching through the acrylic will take a little elbow grease, but as long as you heated the acrylic sufficiently, it's not too hard. Repeat Steps 2 and 3 until the entire edge of your acrylic is punched. Repeat steps 1 through 3 for each sheet of acrylic in your album.
 Step 4 - Reheat. Once the entire edge of the acrylic piece is punched, reheat both sides of the punched edge with your heat gun for approximately 30 seconds each (moving back and forth along the edge). This will melt any acrylic spurs that were formed by punching and gives you a nice smooth punched hole. You may want to brush off any acrylic dust on the edge before you do this so that you don't melt the dust onto the surface of the acrylic. Repeat this step for each punched acrylic piece.
Here's my pile of punched acrylic. Fully heating/punching 12 sheets of 8x10 acrylic took me about an hour. Next, book binding:
In the picture below, I am binding an 8x8 piece of acrylic to an 8x10 piece of acrylic along the right hand edge to create a fold out inner page for my acrylic book.
Step 1 - Tape Outside. Cut a piece of binding tape the same length as your acrylic book. Lay the tape, adhesive side up, on your table. Place one piece of acrylic on top of approximately 1/3 of the binding tape and press down to get the acrylic to adhere to the tape.  Step 2 - Fold. Place the second piece of acrylic on top of the first and line up the edges of both pieces of acrylic. Fold the binding tape over the edges of both pieces of acrylic and adhere the tape to the top piece of acrylic. Press the tape down from the middle out. Press the tape down along the edges of the acrylic as well.
 Step 3 - Tape Inside. Open the pieces of acrylic. Cut a second piece of binding tape the length of your acrylic. Line up the edges of the second piece of binding tape with the edges of the first and adhere to the acrylic. Press the binding tape down to make sure it binds well.
 That's all there is to it, here's the finished book binding:

If you wanted to create a fully book bound album, you would tape all the inside seams between the acrylic pieces first and then tape the outside edges of all of the acrylic pieces at once.
Finally, ring binding.
In the pictures below, I am ring binding (with ribbon) an 8x6 piece of acrylic to the right edge of an 8x10 piece of acrylic to create a smaller fold out page in my album.
Step 1 - Measure and Mark. Figure out how many holes you want and where you want them to be. Measure and mark your acrylic with a Sharpie (you can remove Sharpie with alcohol ink blending solution if you end up with a stray mark). Keep in mind that if you are using ribbon and not rings to bind your pages, you'll want to keep your holes relatively close to the edge of the acrylic. Step 2 - Heat and Punch or Drill.
You can make your holes using the heating method described above for wire binding and using the Crop-a-Dile to punch the holes. Heat the acrylic as described above for wire binding. Heat the location for one hole at a time.
If you don't have a Crop-a-Dile or a heat gun, you can drill the holes for you ring binding. Start with as small a drill bit as possible and work up to the size hole you want. If you start with a large drill bit the acrylic will crack. Don't lean into the acrylic like you would with a piece of wood. The less pressure you put on the acrylic during drilling, the less cracking you will get. Just be patient.
Step 3 - Bind. Once your holes are drilled, add your rings, ribbon, chain, etc. In this instance I am using ribbon. Remember to open your bound pages before finishing tying your knots to make sure you are leaving enough slack in the ribbon for the pages to open easily. So, I'm using all three binding methods in my acrylic book. Here's a peak at the overall construction (without the wire binding, I'll add that at the end):

 That's it for today. Next week I'll be sharing some HEAVY DUTY techniques for acrylic.
Happy humpday!


5 comments:
I love the flexibility this gives you. Normally you're stuck when it comes to acrylic. I can't wait to give it a try!
Amanda I am keen to give this a go as I have a bind it all....just need to get my hands on some acrylic. I am just worried I wont have the patience.
Thank you for trialling and erroring on our behalf! I was wondering how to bind my own album and know i know!
Thanks!
This is a great how-to post! Thanks for sharing. Also...fiy: I may be a bit bias because I work for Clear Scraps...but our acrylic will not crack if you use it with the Bind-it-all or the Crop-a-dile. It's a more flexible, but strong acrylic than a few of the other companies you listed :) I love the book-binding technique...can't wait to try that!
"Great post !!! Post is very interesting..Thanks for sharing this nice post with us !!!!!
PVC Covers
Post a Comment