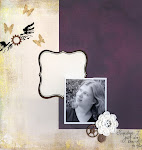
For the most recent Method Playground challenge, I created some collage flowers for my layout: Here's a step-by-step on how to create these flowers. Scroll all the way to the bottom to see how you can win some!
Step 1 - Create a collage background from paper scraps in a color theme. Add ink, paint, stamps, etc., as desired. I used black, white, and gray paper scraps, Black Soot distress ink, and a graph stamp. See this post for more instructions on creating a collage background. Use light weight 12x12 cardstock as a base for this collage.
 Step 2 - Cut your collage into 1 x 12 inch strips. Because of the thickness of the multiple layers of paper, your paper trimmer may not cut all the way through. Use scissors to finish the cuts if needed.
 Step 3 - Because of the multiple layers of paper, your strips will be rather stiff. Make them easier to work with by rolling each strip four times, twice from each end (once with the front side up, once with the back side up).
 Also bend your strips lengthwise, both upwards and downwards.
 Step 4 - Starting at one end, fold the strip over approximately 1 inch.
 Step 5 - At the base of the first petal, fold the strip again, offset from the first petal.
 Step 6 - Fold the strip over again, at approximately one inch, creating the second petal.
 Step 7 - Repeat steps 5 and 6 to create three more petals.

 Step 8 - Lay the flower on the table and press down to flatten the folds.
 Step 9 - (Photo is looking at the back of the flower) Glue the first fold (the first petal) together, then glue the overlapping portions of the remaining petals together. Use glue dots or a heavy duty glue like Glossy Accents.
 If you used a wet adhesive, place the flower under a heavy object to dry. (This photo has a very Wizard-of-Oz feeling to it!)
 Step 10 - Lay the bottom side of a 1/4-inch grommet (found in the notions section of craft stores) in the middle of the flower and trace the inside.


3 comments:
Very cool flower! Love the grommet centers!
As always, another awesome creation! I envy your talent...
These are truly unique. I am reminded of the times I worked with my daughter at the Paper Garden. =)
Post a Comment