 Tonight we simply made a pitcher of sangria and stayed in.
PAD 2-27-09
In case you are wondering why I haven't posted a photo for February 27th...I took a picture of our apartment complex from the outside. On further consideration, it occurred to my it may not be the best idea to post this photo on the web. Thanks for your understanding.
Saturday, February 28, 2009
PAD 2-28-09
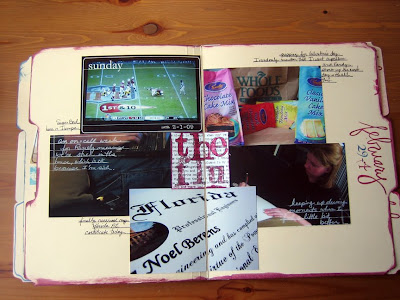
OMG, A Layout!
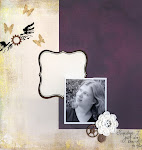
Can you call yourself a scrapper if you never scrapbook? It's been a while since I sat down just to do a layout. But I love how this recent creation turned out. Simple, but still artsy. And it's a two-pager to boot!
Click the photo for a larger image.
Thursday, February 26, 2009
PAD 2-25-09 All Painty and Inky
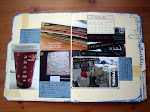
 I'm taking Art Journaling 102 by Dina Wakley and this is the background of my first page. The bummer part is, I kinda like it as is, I don't want to mess it up now!
Farktography - The Moon
This is the most awesome Farktography contest I've seen, all things moon related. Check it out here.
Tuesday, February 24, 2009
PAD 2-24-09 Yes, We Rented
 We hadn't rented a movie/video game in more than three years. See, the last time we rented a movie from Blockbuster, they claimed we didn't return it (although we did) and charged us $100. So my hubby swore he'd never rent again. For the last three years we've been buying new movies and games. We finally compromised and joined a non-Blockbuster rental place. And I'm glad we did, because I'd have been really mad if I had paid full price for either of these.
PAD 2-22-09 Try, Try Again
 See, I'm allergic to shellfish. Have been most of my life. Because of that, I never really ate ANY kind of seafood growing up and therefore have no taste for it as an adult. However, my doctors keep telling me to eat more seafood. So, I try, and try, and try again. But, I just don't enjoy it. Although I have to admit, this blackened grouper is the closest I've come to enjoying a seafood dinner since the red snapper fish and chips I had at a little soul food restaurant in San Francisco.
Monday, February 23, 2009
Weeks 4, 5, 6, and 7 PAD Layouts
Sunday, February 22, 2009
A Valentine's Project
For this Valentine's day (okay month, I fell a bit behind with the flu) I wanted to create a love themed project that could be used as a piece of home decor around Valentine's Day but could also be viewed as a mini-book during the rest of the year.
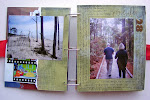
I used a Peek-a-Boo album by Tinkering Ink (see here) and Little Yellow Bicycle's Love Letter's line (see here) to create a accordion fold mini-album that can be shown as a continuous piece on a shelf or coffee table around Valentine's Day. Remember, you can click on any of the photos below for larger, more detailed versions.
I created two distinct sides to the project, this first side has an informal feel, with candid photos of different sizes and random placement.


 Here are the close-ups of the formal side:


 And here is what the whole project looks like as a mini-book:


 Each photo on the "formal" side hides journaling.
 Journaling: We went to high school together, although he was a year ahead of me. I first met him during a summer geology class between my Freshman and Sophomore years. I developed an instant crush just to learn he was leaving to go to the Governor’s school for his last two years of high school. But he returned to our high school during October of my Junior year, right in the middle of my – soon to be our – AP chemistry class. The following March, we competed in an academic competition together and got a chance to get to know each other. We soon started dating, attended prom together, and had a wonderful summer. He left that fall to go to college in Colorado while I finished high school. We kept up a long distance relationship for one semester, but it ended that first Christmas break. We tried dating again when he came back that first summer, but it didn’t last long. He had no plans to return to Colorado, but I was leaving for college in Missouri.
 Journaling: We didn’t speak for over two years. During that time, he and his family moved to Florida, so I didn’t know where to find him even if I went looking. We both were working on finishing college, me in Missouri and he in Florida. We both dated and in general went on with our lives. Then, in October of my Junior year, I received an e-mail from him. He had stumbled upon a student web page I had created. That one e-mail sparked an entire long distance relationship. We e-mailed, spoke on the phone, and made plans to meet over Christmas. It turns out that we were both still in love with each other, even after all this time. For a year, we visited each other whenever we had a break from school and racked up record phone bills. We spent the summer together. Then, during fall of my senior year, he decided he needed a break from college while he decided what he wanted to do, and moved in with me in Missouri while I finished school.
 Journaling: Toward the end of my senior year, I accepted a job in Milwaukee, Wisconsin. After graduation, we packed up what little we owned and moved it eight hours north. We went through the normal trials of a first year couple, little money or furniture and we were in a place we were unfamiliar with and where we knew no one. But we made it work. We developed a love for bad baseball and cool bars and a dislike for snow and ice. After a year and a half, he asked me to marry him and I said yes. We spent the next ten months planning an outdoor wedding to remember.
 Journaling: We were married on an extremely windy but mild day in October 2000. We had a beautiful ceremony in a park overlooking Lake Michigan and a reception at a local country club. We went to Las Vegas for our honeymoon because we had spent all our money on the wedding. We ended up renting a car and ditching Las Vegas for nearby Zion National Park. We always have fun no matter where we are. After four years in Wisconsin, we moved to California for the adventure.
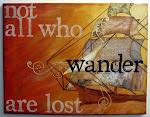
 Instructions for creating the text covered grungeboard letters can be seen here. The technique uses tissue paper instead of cardstock so the letters retain the texture of the grungeboard. I covered these grungeboard letters with the lyrics from the first song we danced to at our wedding. You can see the full lyrics (and hear the song if you want) here. Because these letters can be seen from both sides, I trimmed the excess tissue paper with a craft knife instead of folding it behind the letter as described in the instructions.
Saturday, February 21, 2009
PAD 2-21-09 Anatomy of a Fridge
Middle Shelf:
Bottom Shelf:
Wow, I'm eating really healthy these days.
Friday, February 20, 2009
PAD 2-19-09 OOPS!
Oh spoo! (that's "oops" backwards, an inside joke in my family for YEARS).
I forgot to take a picture today. But I have the perfect idea for one. My *extra* messy desk at work, had a REALLY hectic week this week. Since I'm working from home on Friday, I will take this picture on Monday, before picking up to start the new week. Look for the makeup photo then. Hey, this is supposed to be a no-stress project, right?
Wednesday, February 18, 2009
PAD 2-18-09 Guacamole Wars
Tuesday, February 17, 2009
PAD 2-17-09
A peek at a Valentine's mini-book I'm working on. I'm frustrated with it because it's just not coming together the way that I hoped...
Monday, February 16, 2009
PAD 2-16-09
Helping my hubby with his math homework. This makes us even, he had to de-bug my groundwater modeling code in graduate school.
PAD 2-15-09
Gluten-free, dairy-free, all natural Valentine's Day cupcakes. Despite the name, they were actually quite nummy. This is the first time I've been able to have cake in more than 2 years.
Sunday, February 15, 2009
February Technique 2 - Text Anywhere
Have you ever wanted to be able to print text on objects you can't run through your printer? Like chipboard accents, for example, or large projects. I'll show you one way to go about printing whatever text you would like on un-printable surfaces.
Remember, you can click on the pictures to view larger, more detailed versions. Also, I apologize in advance that today's step-by-step photos are from two different projects, I haven't been able to get one full set of step-by-step photos from one project for a variety of reasons.
Step 1. Print Your Text. Grab a piece of cardstock the size of the text you want to print. I am using 12x12 cardstock, but if you don't have a large format printer, 8.5x11 cardstock is fine. Feel free to use "scrap", "cheap", or "ugly" cardstock, we will only be using this piece of cardstock for a base. Run a line of dry adhesive (I suggest some kind of adhesive runner for this) around the edge of your cardstock (as close to the edge as possible), all the way around.  Now, adhere a piece of white tissue paper to your cardstock. The easiest way to do this is to lay your tissue paper down flat on your work surface and lay your cardstock down on top, adhesive side down. Now trim off the excess (overhanging) tissue paper.
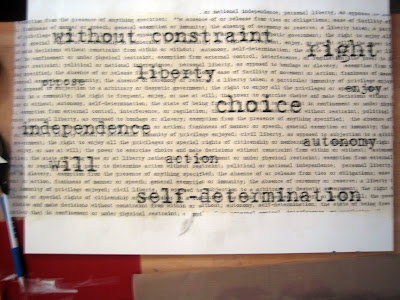
 Now run your tissue-paper-covered-cardstock through your printer as usual. Use the "text" setting on your printer as opposed to a "photo" setting because this will use less ink and your printed tissue paper will be less likely to smear during the next steps. You could also consider using the "draft" setting on your printer if smearing is still an issue because this setting uses even less ink. No matter which setting you use, you will need to let to ink set at least 15 minutes before moving onto the Mod Podge steps described below, although you should be able to handle the tissue paper at this point.
I used 1/2-inch margins with my text because the portion of the tissue paper that is adhered to the cardstock will be unusable anyway.  Now cut your printed tissue off of the base cardstock by gently running a craft knife just inside the adhesive line.
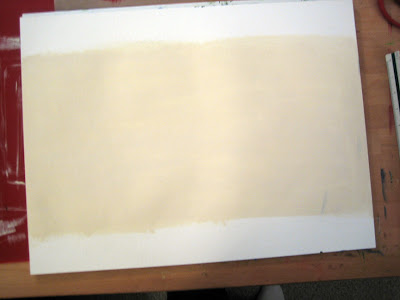
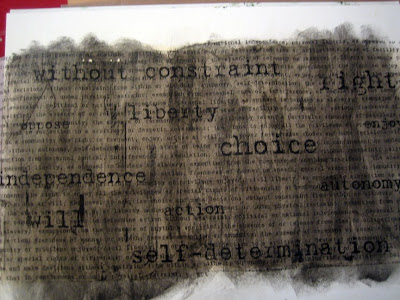
 Step 2 - Prepare Your Surface. Create your project or paint your chipboard letters or whatever surface you are trying to adhere text to. Keep in mind that the white tissue paper will ALMOST completely disappear if you follow the steps below. This means that you will not be able to see the tissue paper on a light colored surface and the tissue paper will slightly lighten medium colored surfaces. I would suggest a slight modification to this technique for dark surfaces. I would suggest adhering the tissue paper to a light colored surface and then painting the tissue paper a darker color after the last step. An example of this modification is shown further down.
Step 3 - Adhere the Tissue Paper. Brush a heavy layer of Mod Podge unto your surface and then either lay the tissue paper, printed side up, onto the Mod Podge'ed surface (if you are covering a large surface, like a background) or lay your Mod Podge'ed object onto the back of the printed tissue paper (if you are covering smaller surfaces, like chipboard accents).  Allow 5-10 minutes for the Mod Podge to mostly dry. If you are covering smaller accents, cut them apart at this point. Trim down larger areas of overhanging tissue paper.
 Cut the overhanging tissue paper at any corners or curves so that the excess can easily fold around to the back.
 Run a line of adhesive down the back edges of the object you are covering. Now, lay a heavy layer of Mod Podge on top of the tissue paper. The objective is to saturate the tissue paper (which is what makes it ALMOST disappear). Make sure you let the underlying layer of Mod Podge dry for 5-10 minutes before adding this layer or your tissue paper will tear from being too wet. While the Mod Podge is wet, fold the overhanging tissue paper around to the back and press it into the adhesive. Use your fingers to flatten the tissue paper along the edges of your object.
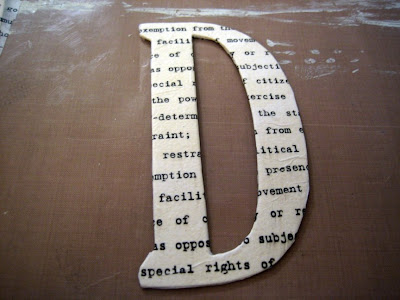
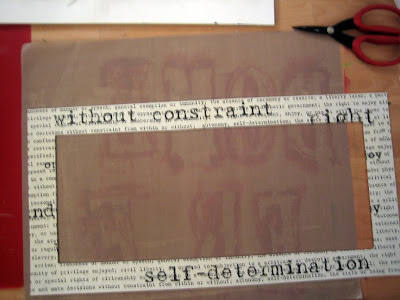 Let the Mod Podge dry and you're done. If you want a darker surface, you can use acrylic paints to paint on the Mod Podged tissue paper to give you a darker effect.