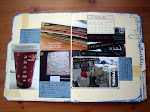
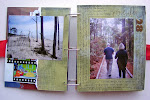
I decided I wanted to make my own art journal, but instead of an art journal made of paper, I decided to bind one out of canvas. It's really easy to do and I love the results. Especially the rough edges. Remember, you can click on the photos below to view larger, more detailed versions.
Step 1 - Cut your canvas pages. I wanted 9x9 pages so I cut mine to 10x10.5 (this will give you 1/2 inch margins on three sides and a 1 inch margin on the side you will be binding). You will need two pieces for each page. I cut 14 pieces for 7 pages.
Note: Canvas is also known as Duck cloth when you go looking for it at the fabric store. I just used natural color canvas, but it's available in a range of colors, including white. Step 2 (optional) - Iron your canvas pieces. Iron your canvas pieces if you want to remove the fold lines from the fabric. If you like the fold lines, leave 'em. Use the highest setting on your iron.
Step 3 - Sew your pages. Ok, don't freak out on me, we're talking very simple sewing here. Just make sure you are using a high gauge needle (one meant for denim, for example). I used a 100/16.
We'll be sewing two pieces of canvas together to make each page. Doubling up the canvas provides stability to the pages. Before you start sewing, you'll need to temporarily join each pair of pieces together. The "normal" way to do this is with pins, but stick pins and I have never gotten along, so I just used a bit of adhesive runner in all four corners. Worked perfectly. As I mentioned above, I sewed a 1/2 inch margin an three sides (upper, right, and lower, as shown below) and both a 1/2 inch and a 1 inch margin on the remaining side (left, as shown below). I sewed two lines on the binding side of the page just to provide a little more stability to the binding.
 Step 4 - Gesso your pages. Gesso provides a painting surface on the canvass. Without gesso, your paint will soak immediately into the canvas and be difficult to work with.
 Step 5 (optional) - Iron your pages. Two of my seven pages had wrinkles after gessoing, so I chose to iron them once the gesso was dry.
 Step 6 - Add grommets. I used We Are Memory Keepers grommlets for the Crop-a-dile Big Bite. Although the grommlets are supposed to be able to be set without punching a hole first, I found that's not necessarily true when you are setting the grommlet through two layers of canvas. I traced the inside of the grommlet onto my canvas and then used the Crop-A-dile to punch a hole just slightly smaller than the grommlet before setting the grommlet.
 Step 7 - Bind. I bound my canvas art journal with twill ribbon. What's great about this binding method is:


7 comments:
I love this idea, thanks for the steps . I already have some canvas and think I'll do this! I love your painted pages too. found you at debbiehodge, I took the AJ 101 and 102 classes too.
Thank you for posting these easy instructions-i'll definitely be doing a project like this:)
This is soooo cool! I definitely want to try this.
How much canvas yardage should I purchase?
should i ask for any specific type of duck cloth?
Great job. I bet it will be beautiful once you start filling it up with artwork.
Deb, The amount of yardage you will need will depend on the size and number of pages in your journal. To make my 9x9 pages, I figures 2 sq. feet for each page (front and back plus waste). If you want 6 pages, you will need 12 sq. feet. One yard of 36 to 44 inch width fabric will give you 9 sq. feet, do you would need 1-1/3 yards.
You don't need to ask for a specific type of duck cloth, however, it is available in multiple colors. I usually use the natural or the white.
Good luck!
Amanda
Thank you so much! Tonight I decided I want to learn to make a duck cloth journal I'm so glad I found you. I don't know what the grommet maker is but I hope it's inexpensive.
Thanks again!
La
Post a Comment